Getting Started with Document Templates
Document templates let Disco ICT produce ready-to-print paperwork such as repair quotes, user agreements and incident statements. This guide explains what a template is, how to add one, how to generate documents from it, and how Disco ICT can automatically file a scanned copy against the right job, device or user.
What is a document template?
A document template is a PDF form. When you generate a document, Disco ICT fills each form field with information from the job, device or user you are working on, and adds a QR code so that the printed page can be recognised later.
You need a PDF form editor (such as Adobe Acrobat or a free alternative) to create or change the PDF. Adobe Reader can’t edit forms.
Inside a template
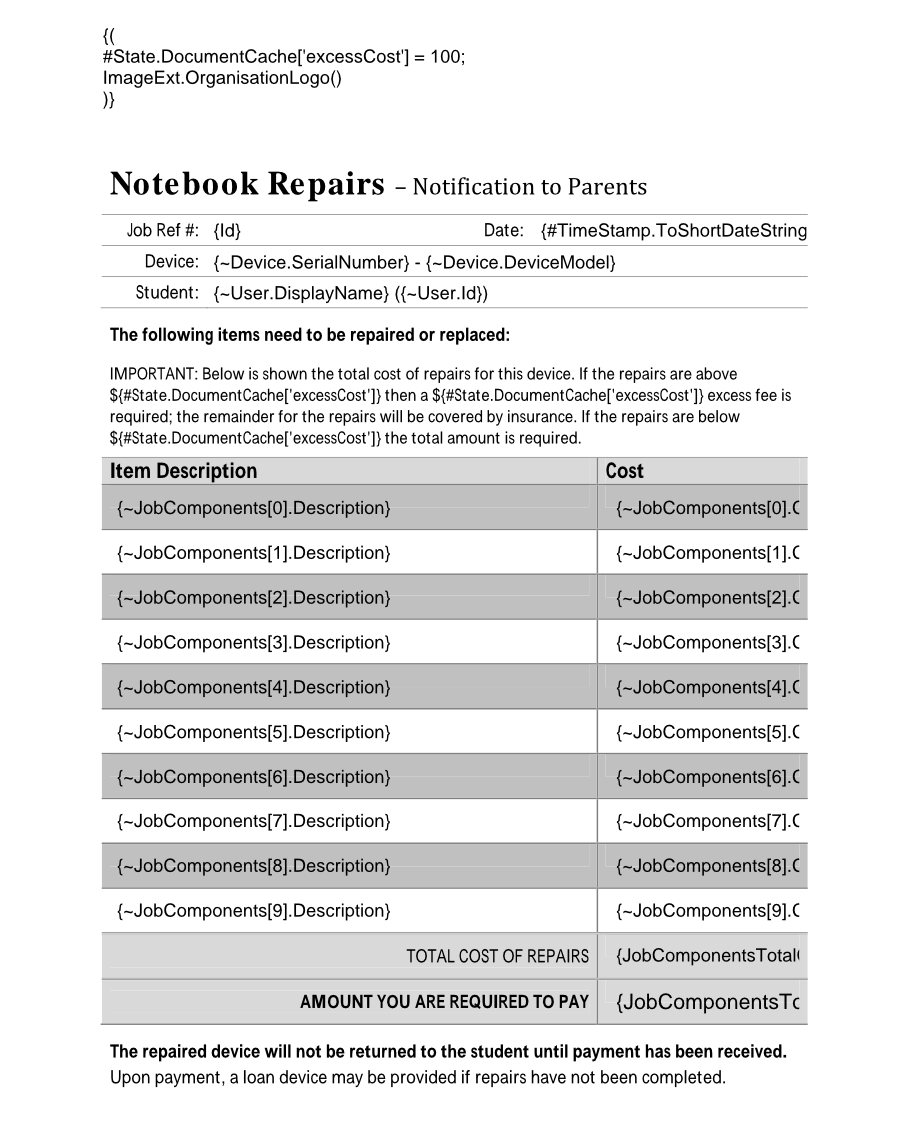
Each form field in the PDF holds an expression that tells Disco ICT which piece of data to insert. The repair quote below is a template for a job; its fields show the expressions that Disco ICT will replace.
- An expression starts with
{and ends with}. Text outside the braces is kept as written. For example,{Id}becomes the job number. - Put
~immediately following the opening brace, as in{~Device.SerialNumber}, to allow errors. If the data isn’t available, the field is left blank. Without the~, the error message is written into the field so that problems are easy to spot. - Expressions can use more advanced features, such as lists. In the repair quote,
{~JobComponents[0].Description}and{~JobComponents[0].Cost.ToString('c')}fill the first row of the repair items table,[1]the second row, and so on. - A multi-line expression wrapped in
{( ... )}can run several statements. The repair quote uses one at the top of the page to set the insurance excess (#State.DocumentCache['excessCost'] = 100) and to add the organisation logo. - The template’s scope (job, device or user) decides which data an expression can see. The repair quote has a job scope, so it can use the job, its device, its user and its components.
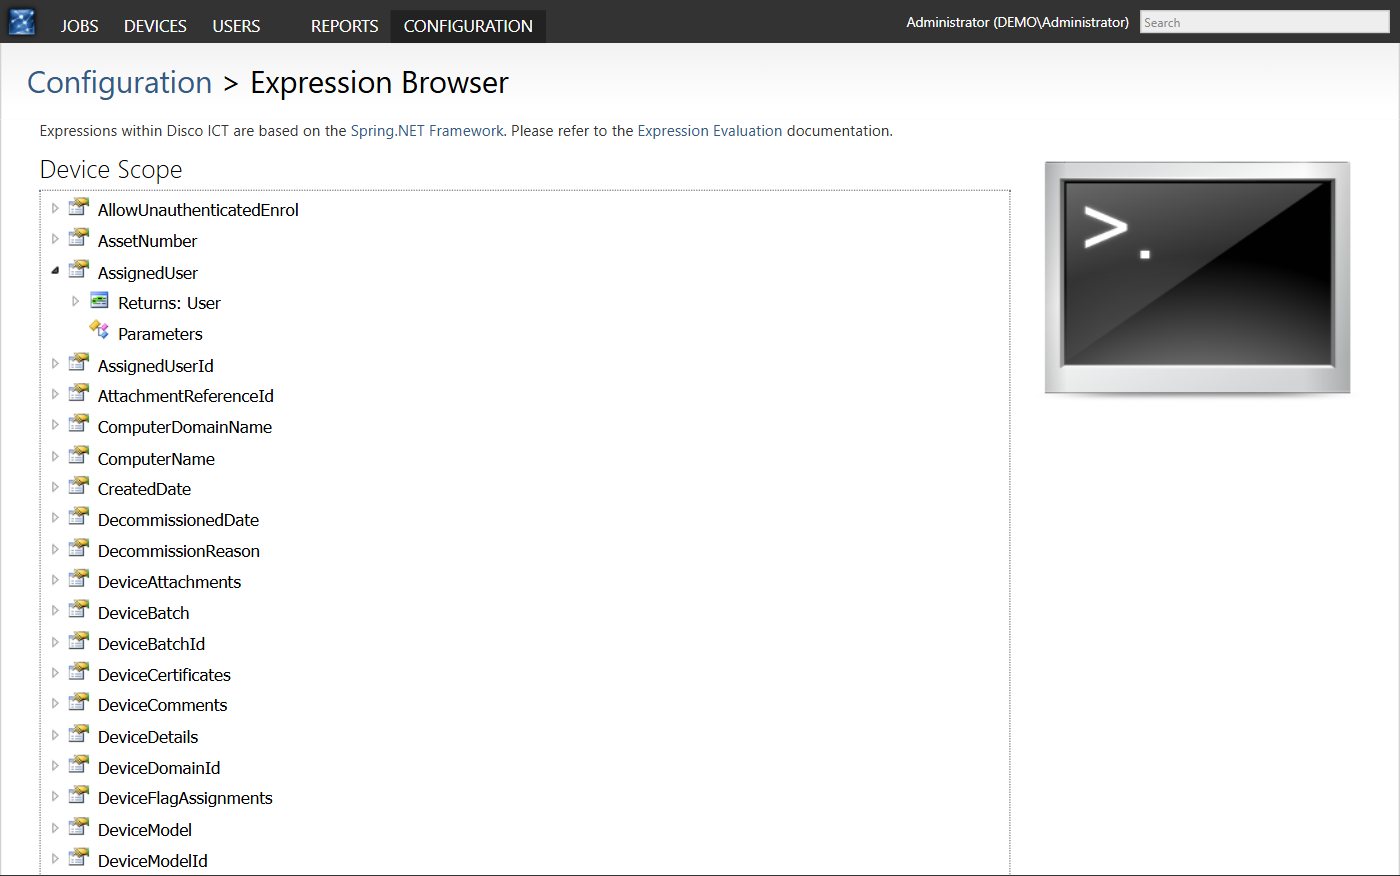
Disco ICT uses the Spring.NET expression language. The Expression Browser (Configuration > Document Templates > Expression Browser) lists everything that’s available in each scope.
QR codes
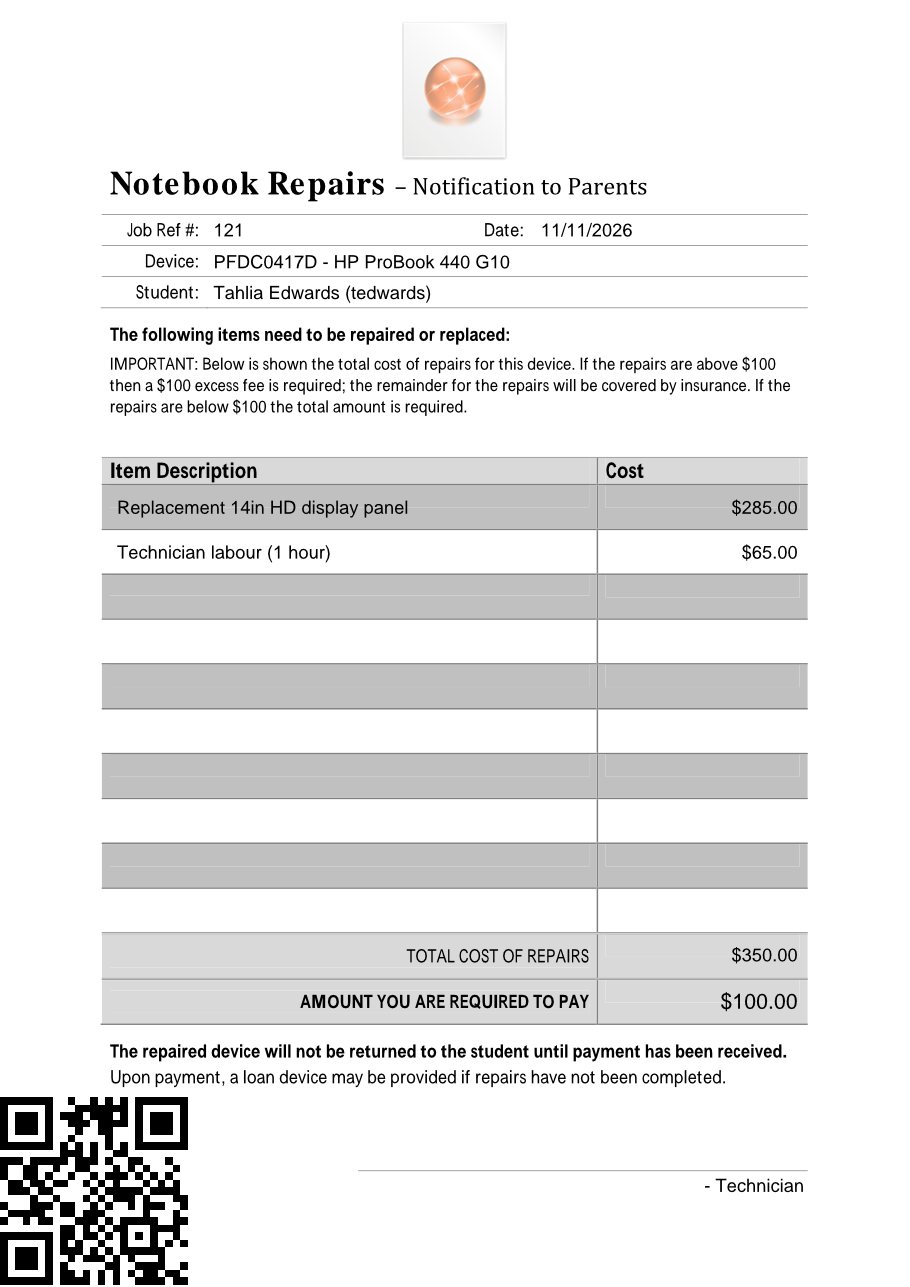
To let Disco ICT recognise a scanned page, add a square text field named DiscoAttachmentId to each page you want detected. Disco ICT fills it with a QR code when the document is generated. The sample repair quote has this field in the bottom-left corner.
When the page is scanned back in, the QR code is used to attach it to the correct job, device or user, to split a large batch of scans into separate documents, and to put pages in the right order.
Adding a template
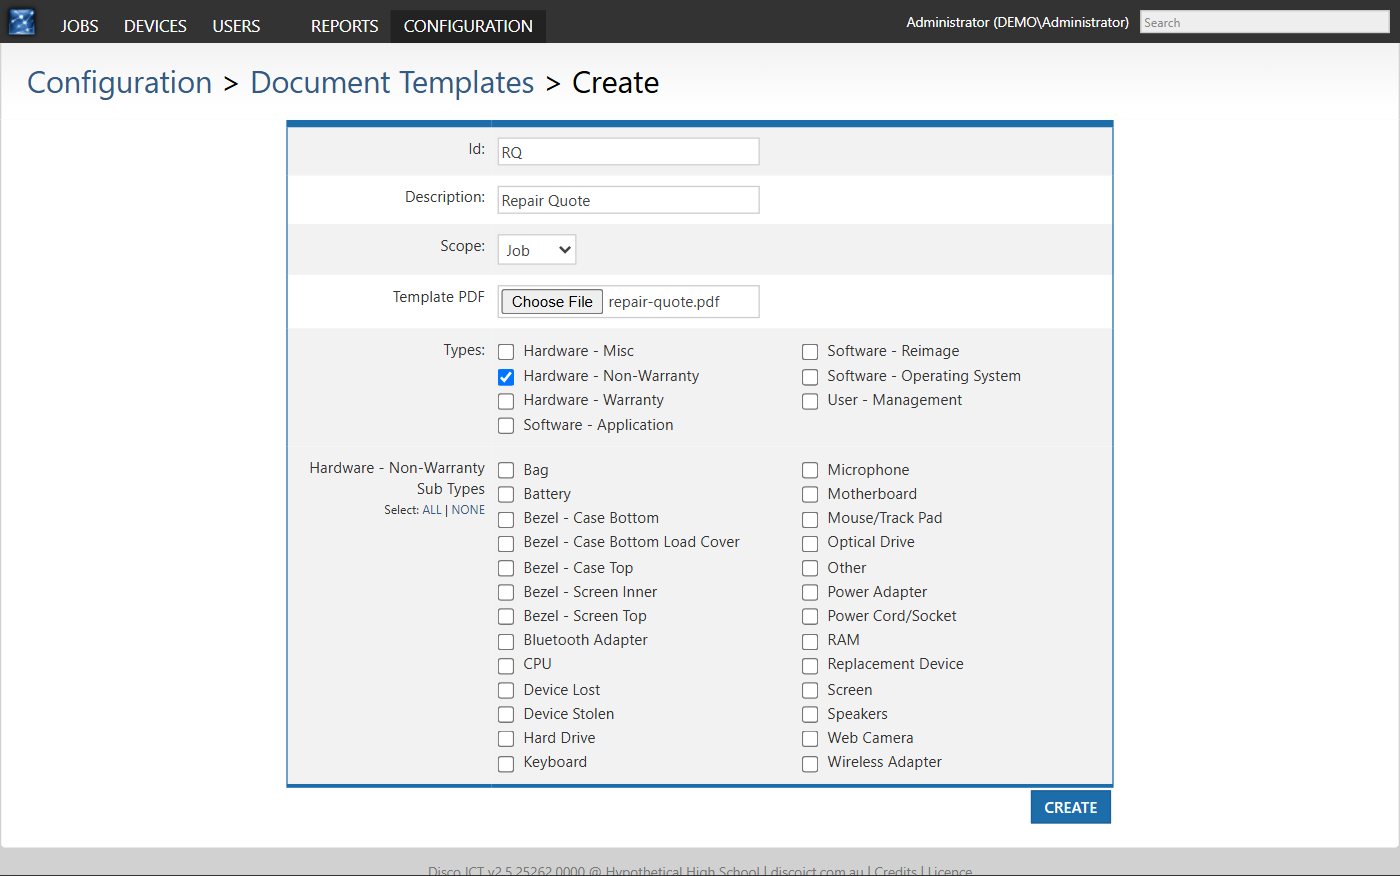
- Go to Configuration > Document Templates and select Create Document Template.
- Enter an Id (a short code, for example
RQ) and a Description (Repair Quote). - Choose the Scope: Job, Device or User.
- Choose your Template PDF.
- For a job template, tick the Job Types it applies to (for example Hardware - Non-Warranty), then tick the Sub Types you want. A template is only offered on jobs of the selected types. If you don’t select any types, the template is available for all of them.
- Select Create.
Template options
After the template is created, its page shows the settings below. Changes are saved automatically.
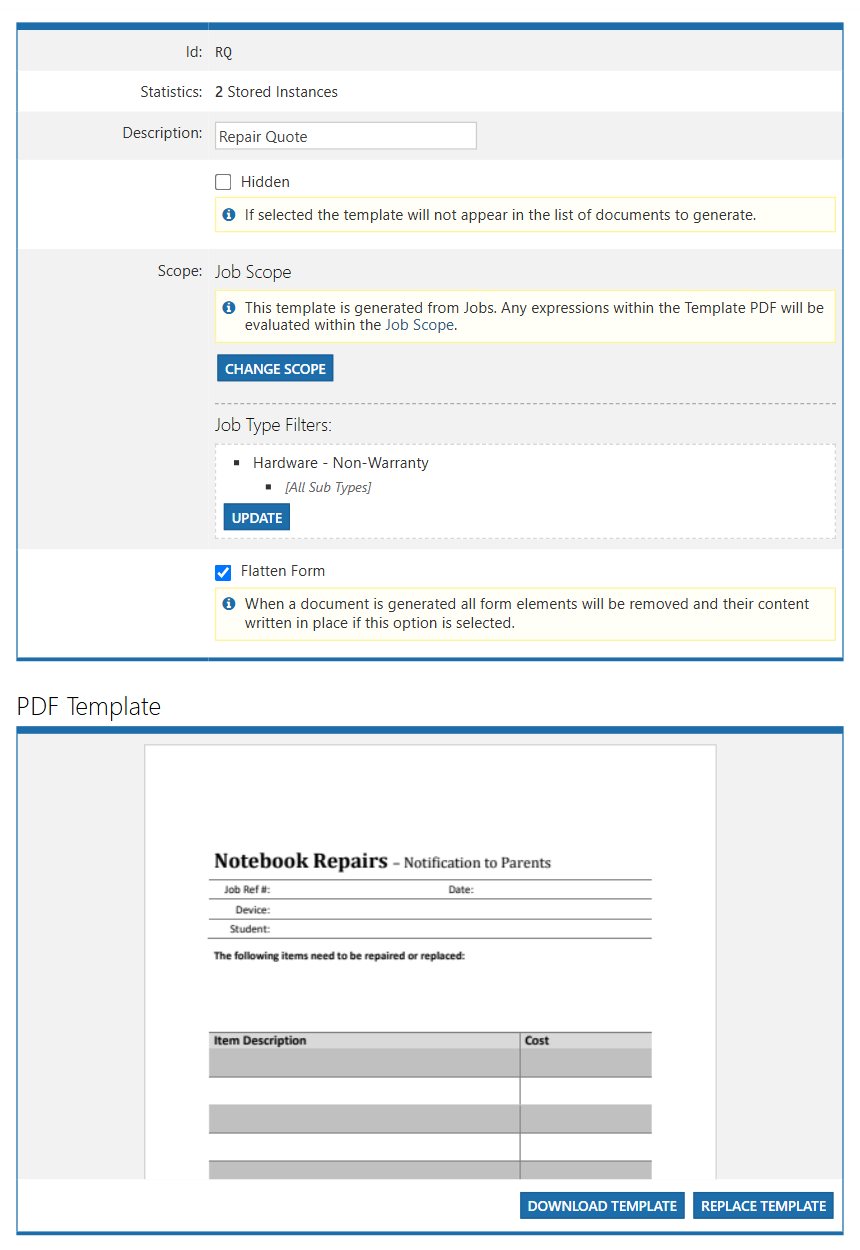
- Hidden: removes the template from the Generate Document list.
- Change Scope and Job Type Filters: change where the template can be used.
- Flatten Form: converts the form to a plain PDF once it is filled in. Enable this for documents that are emailed or won’t be edited; the result is smaller and displays the same in every PDF viewer.
- Download Template and Replace Template: retrieve the current PDF, or upload a corrected version without recreating the template.
Advanced options
Select Show Advanced Options at the bottom of the page for more control.
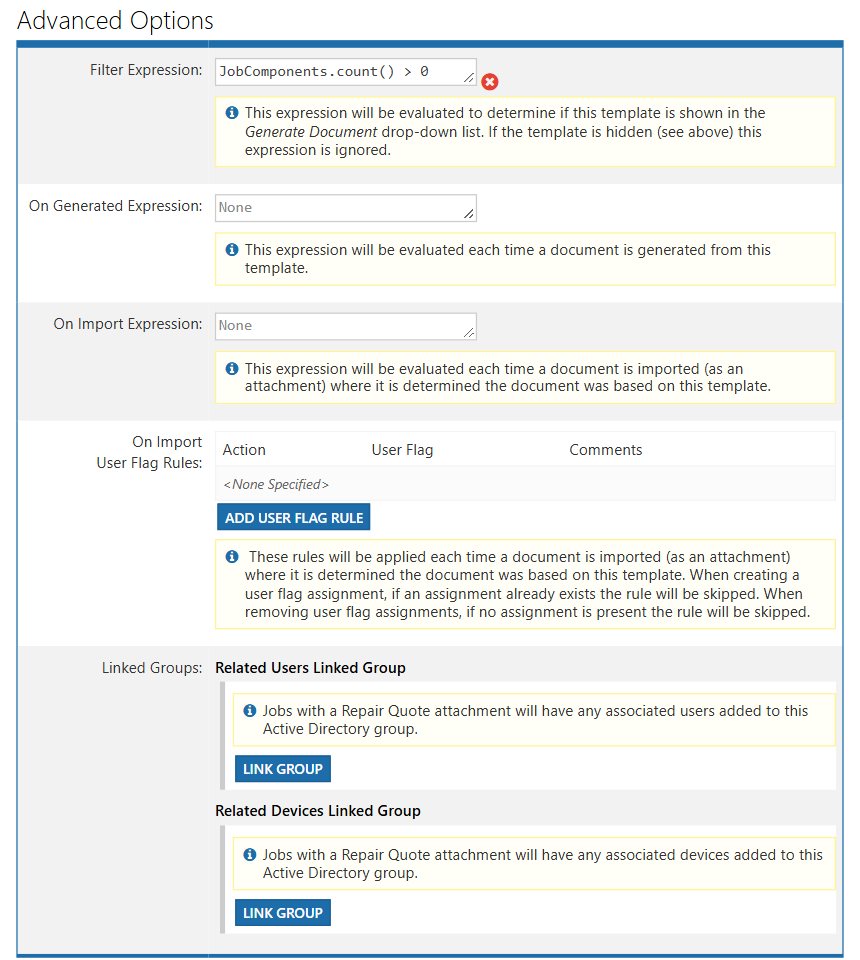
- Filter Expression: decides whether the template is offered for a particular job, device or user. The repair quote uses
JobComponents.count() > 0, so it only appears once the job has at least one component. The sample insurance claim usesJobMetaNonWarranty.IsInsuranceClaim, so it only appears for insurance claim jobs. - On Generated Expression: runs each time a document is generated from the template.
- On Import Expression: runs each time a scanned copy is filed.
- On Import User Flag Rules: adds or removes a user flag when a scanned copy is filed. For example, flag a user as having returned a signed agreement.
- Linked Groups: when a document is attached, adds the related users or devices to an Active Directory group.
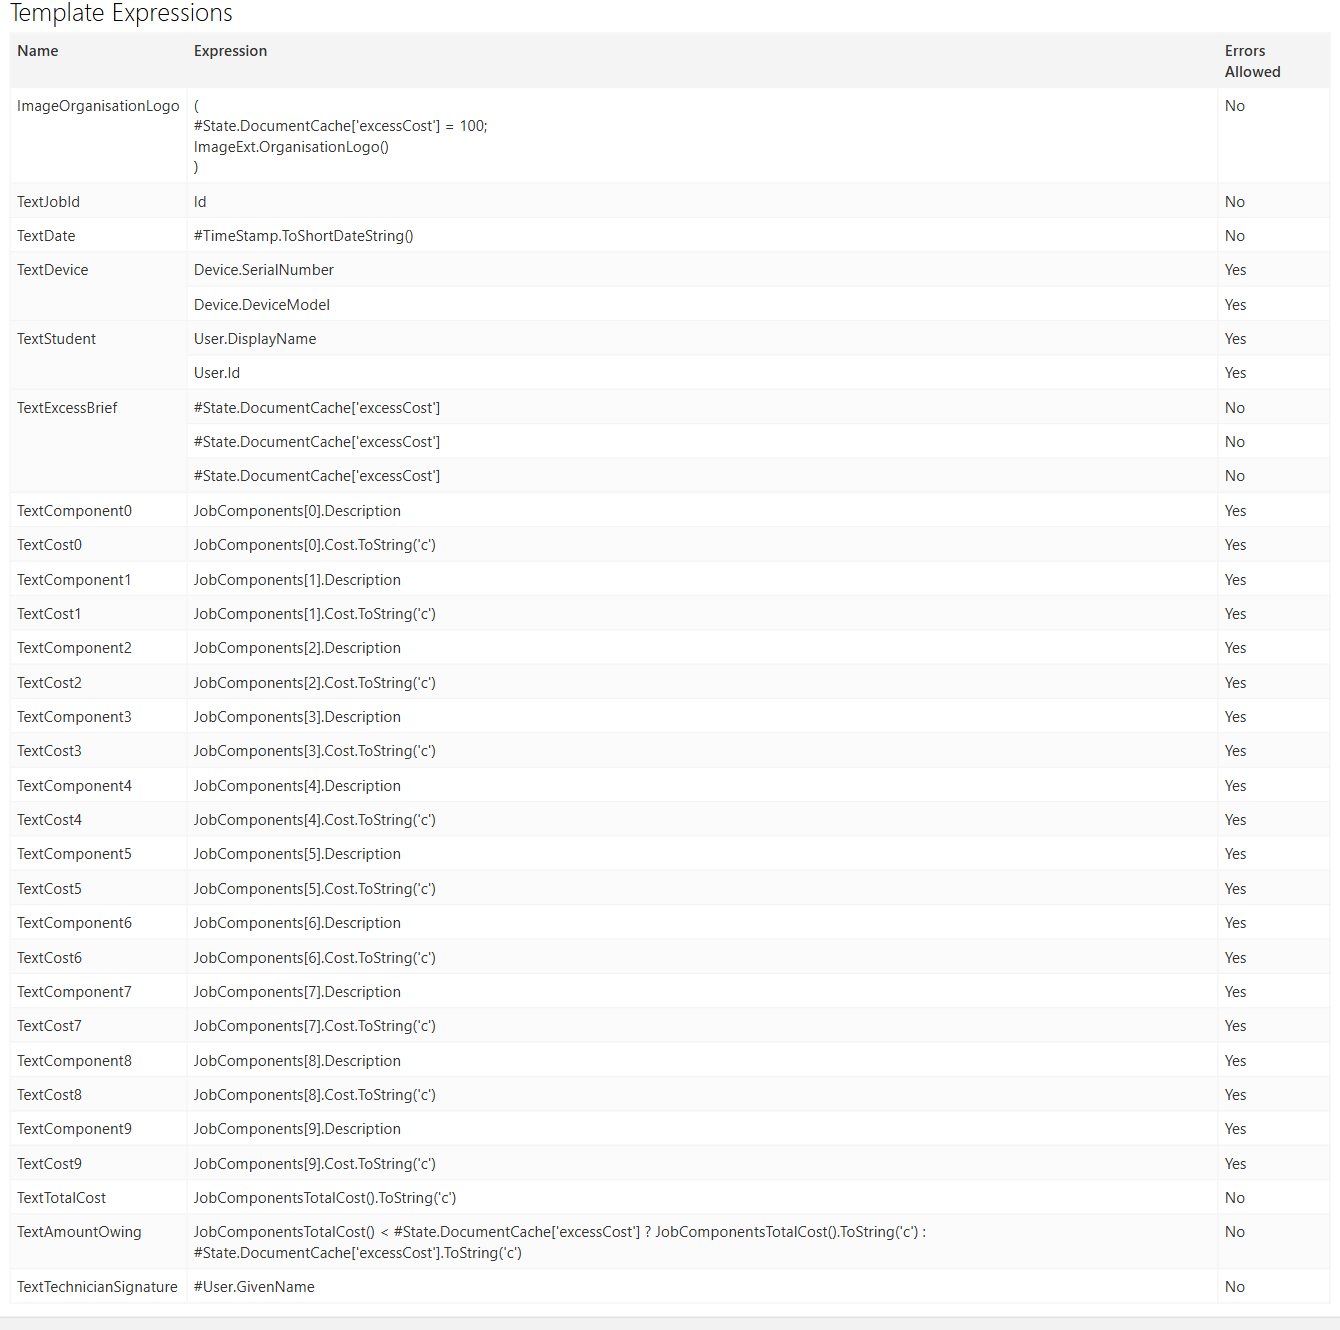
The Template Expressions table at the bottom of the page lists every expression Disco ICT found in the PDF and whether errors are allowed for each. Check it after uploading a new PDF to confirm that every field was read correctly.
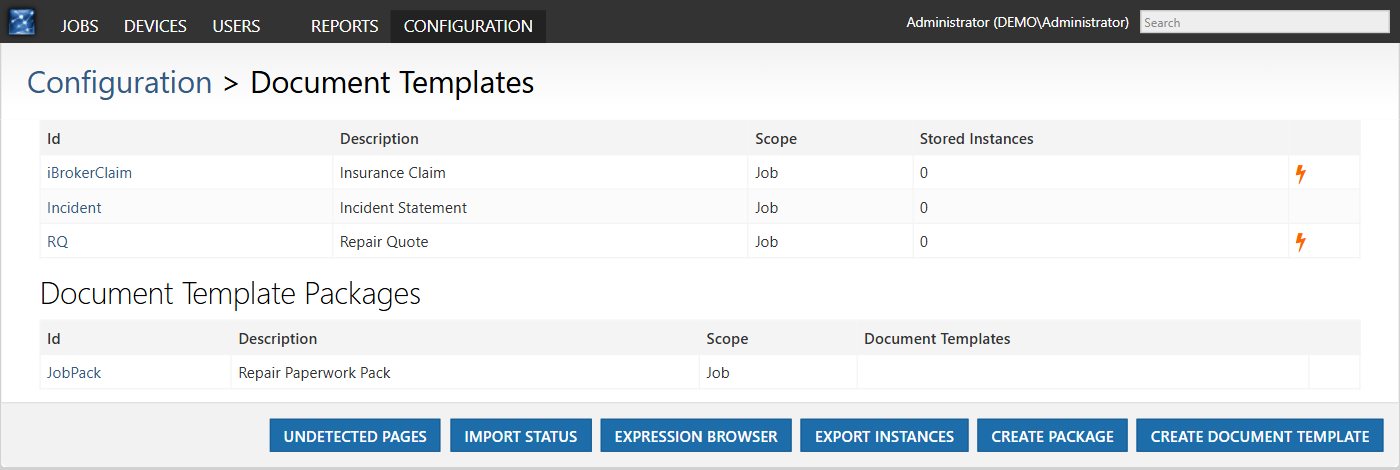
The template list shows every template and package, how many stored copies each has, and a lightning icon for templates that use a filter expression.
Generating a document
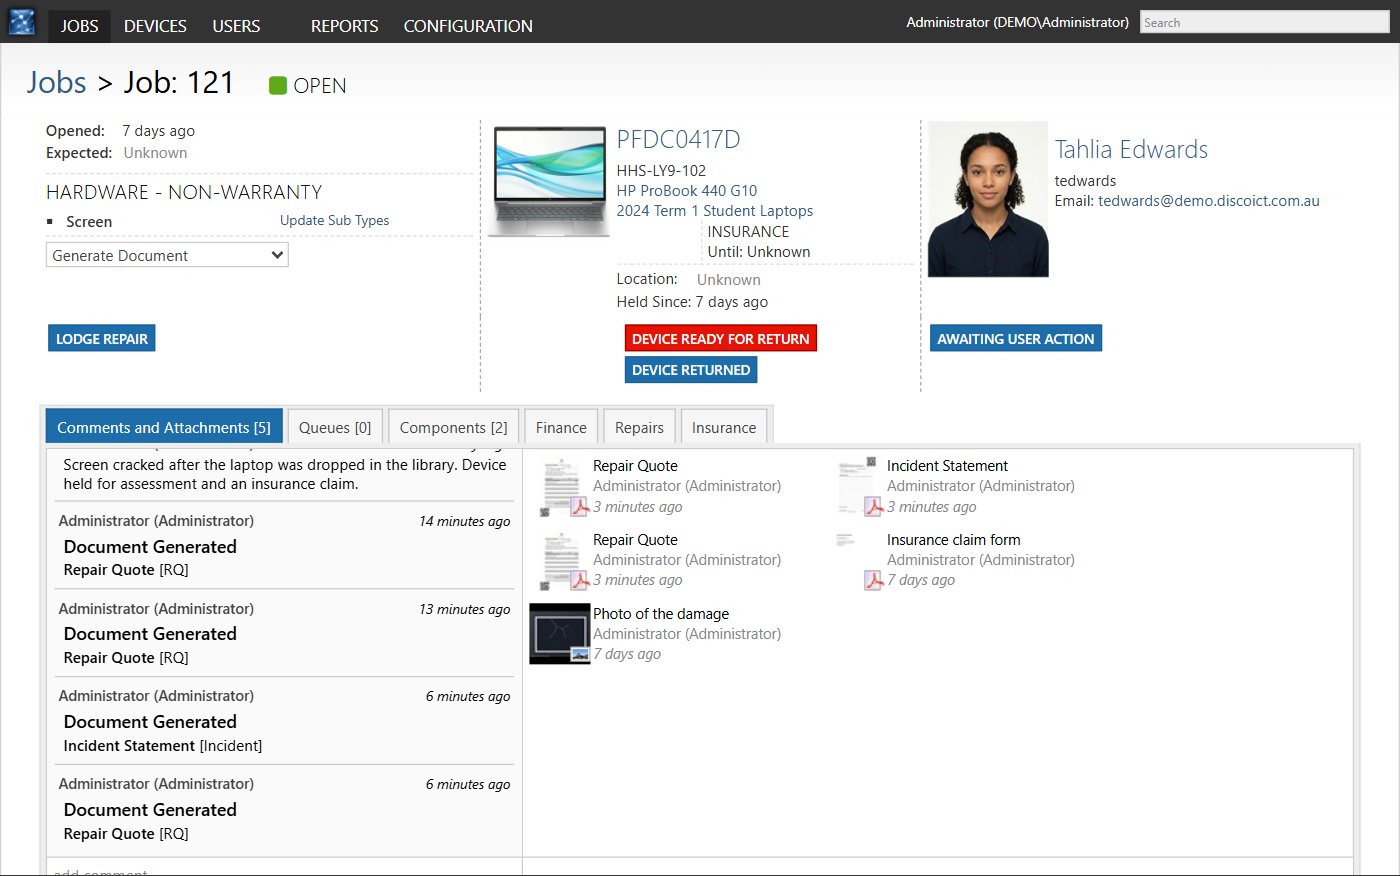
Open a job, device or user and choose a template from Generate Document. Only templates that match the item’s scope, type and filter expression are listed. In the example below, the repair quote is offered because the job is a Hardware - Non-Warranty job that has components.
Disco ICT creates the PDF, downloads it, and records a Document Generated comment on the job.
Here is the generated repair quote. The organisation logo, job number, device, student and repair items have been filled in, the amount payable reflects the insurance excess, and the QR code is in the corner.
Bulk generation
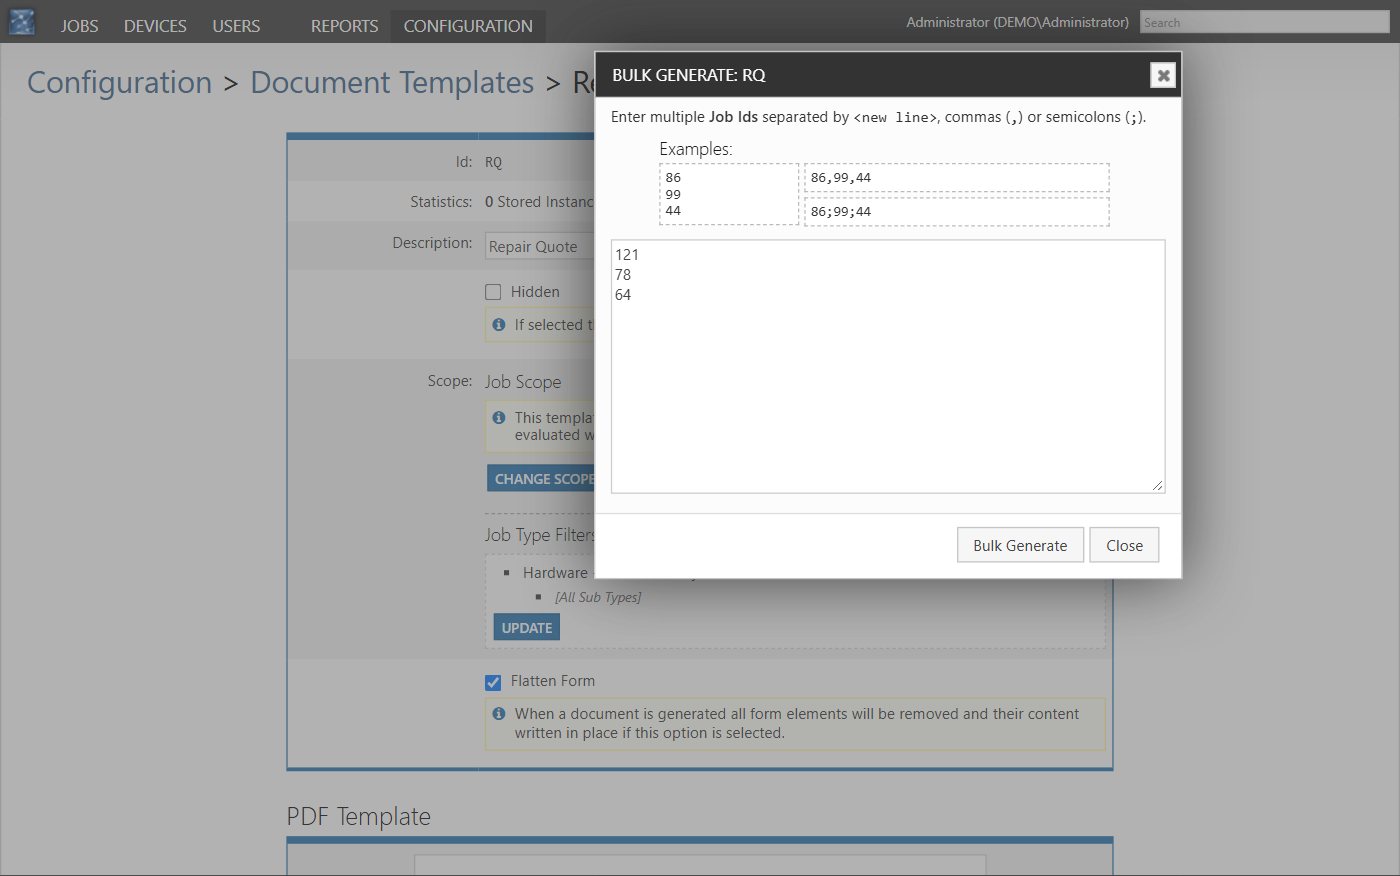
To generate many documents at once, open the template and select Bulk Generate. Enter the ids of the jobs, devices or users (depending on the scope) separated by new lines, commas or semicolons. Disco ICT generates a document for each. This is useful for printing user agreements for a whole year level before devices are handed out.
Packages
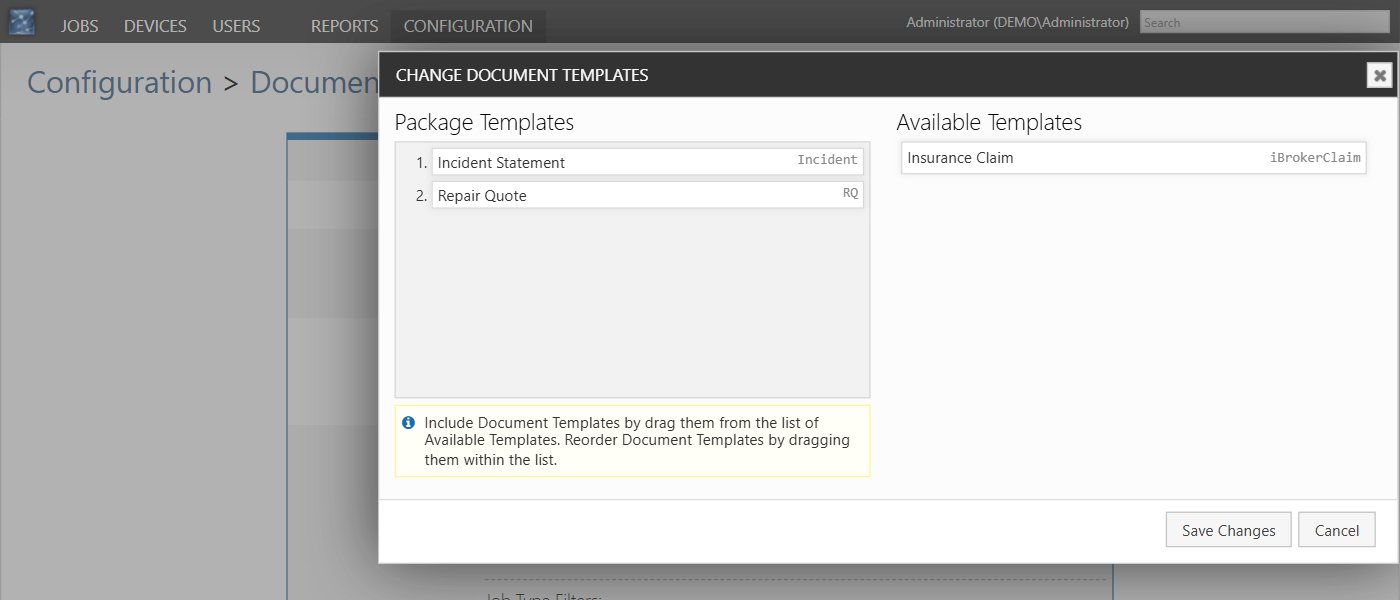
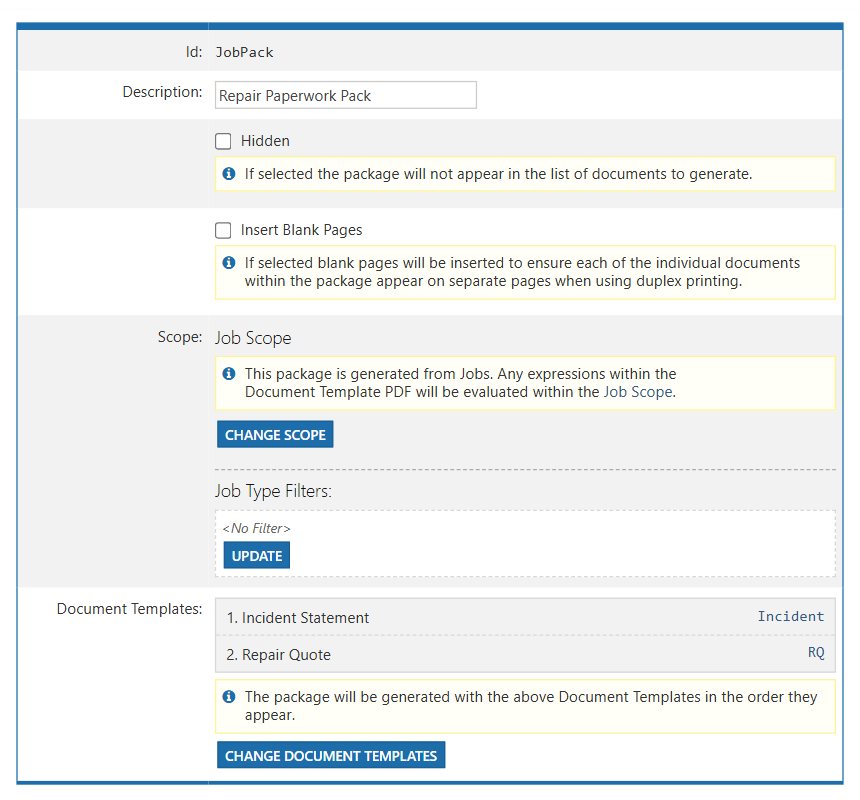
A package is a collection of document templates that is generated as one PDF. Use packages when several forms always go together, such as an incident statement and a repair quote.
- Go to Configuration > Document Templates and select Create Package.
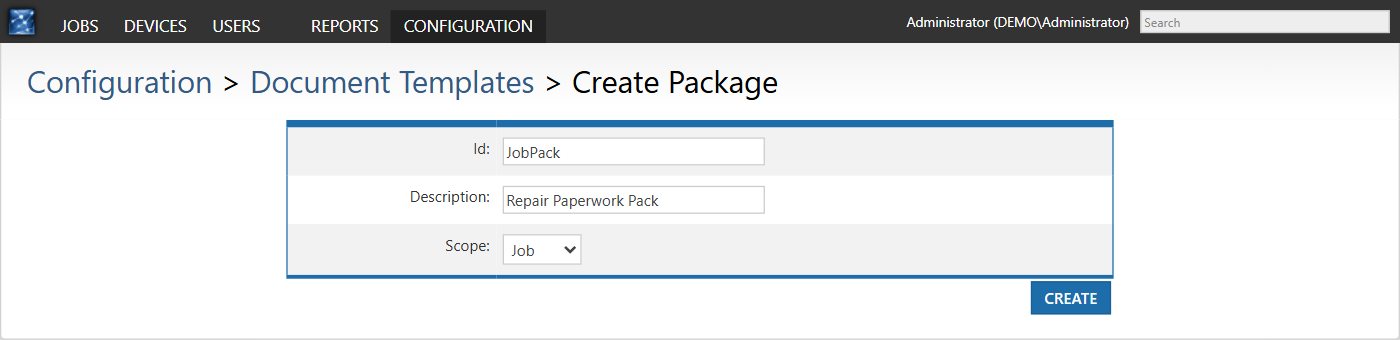
- Enter an Id, a Description and a Scope, then select Create.
- Select Choose Document Templates. Drag templates from Available Templates into Package Templates, and drag them up or down to set the order. Select Save Changes.
A package has similar options to a template: Hidden, job type filters and a filter expression. It also has Insert Blank Pages, which adds blank pages so that each document starts on a new sheet when printed double-sided. Packages can be generated from a job, device or user (they appear in the Generate Document list as Package:) and can be bulk generated like a template.
Scanning documents back in
Print the document, have it completed or signed, and scan it to the Document Dropbox. This is the DocumentDropBox folder inside the Disco ICT file store configured during installation (for example C:\DiscoICT Store\DocumentDropBox). For security the folder isn’t shared by default. To scan straight to it from a multifunction printer, share the folder with permissions appropriate for your network.
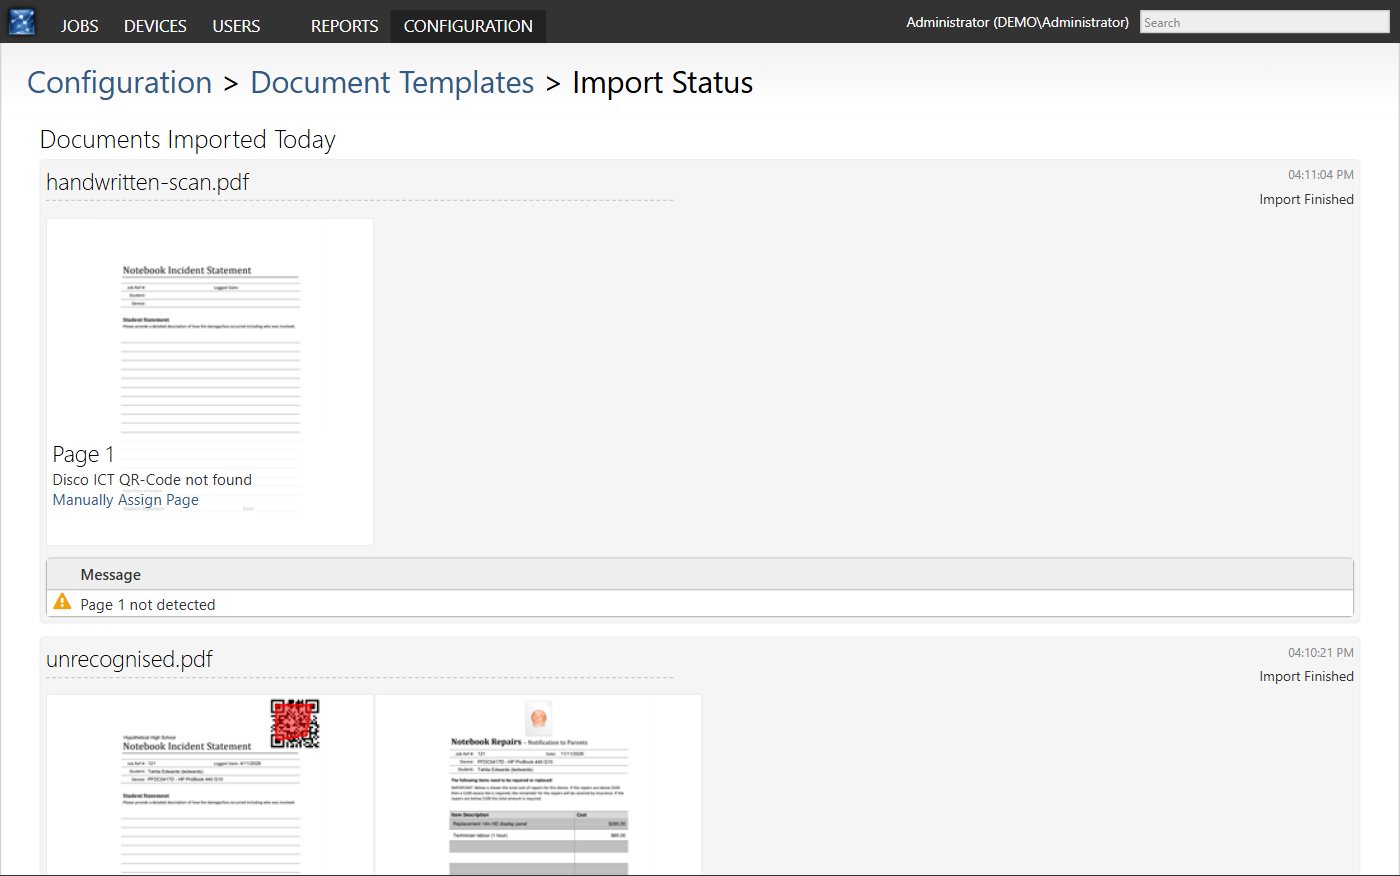
Within a few seconds Disco ICT reads the QR codes, files each page against its job, device or user, and attaches it. A scan containing several different documents is split automatically. In this example, a scanned package produced one attachment for each of its two documents, and both now appear in the job’s attachments.
Open Configuration > Document Templates > Import Status to see what has been processed today. Each page shows where it was filed. If a page can’t be recognised, it is listed as QR-Code not found and appears under Undetected Pages, where you can assign it to a job, device or user manually.
Sample forms
These generic forms are a good starting point. Download one, adjust it for your organisation, and then add it using the settings listed.
- Incident Statement: collects a statement from a user, for example after damage to a device. Settings: Id
Incident, Scope Job, all Job Types and Sub Types, Flatten Form. - Repair Quote: a repair quotation that includes insurance excess logic. Update the
excessCostvalue in the expression at the top of the page to match your organisation. Settings: IdRQ, Scope Job, Type Hardware - Non-Warranty, all Sub Types, Flatten Form, Filter ExpressionJobComponents.count() > 0. - Insurance Claim: a sample iBroker insurance claim form. Settings: Id
iBrokerClaim, Scope Job, Type Hardware - Non-Warranty, all Sub Types, Flatten Form (clear this if you want to keep editing the form after it is generated), Filter ExpressionJobMetaNonWarranty.IsInsuranceClaim.
More information
Expressions are based on the Spring.NET expression language. See Expression Evaluation and the Spring.NET Framework.