Getting Started
This guide was migrated from the previous website and may refer to older versions of Disco ICT.
After installing Disco ICT, use this guide to configure your devices and become familiar with the main areas used by technicians. It introduces models, batches and profiles, then covers enrolment and everyday work with devices, users and jobs.
Find your way around
The top menu provides access to Jobs, Devices, Users, Reports and Configuration. Open Configuration to manage settings:
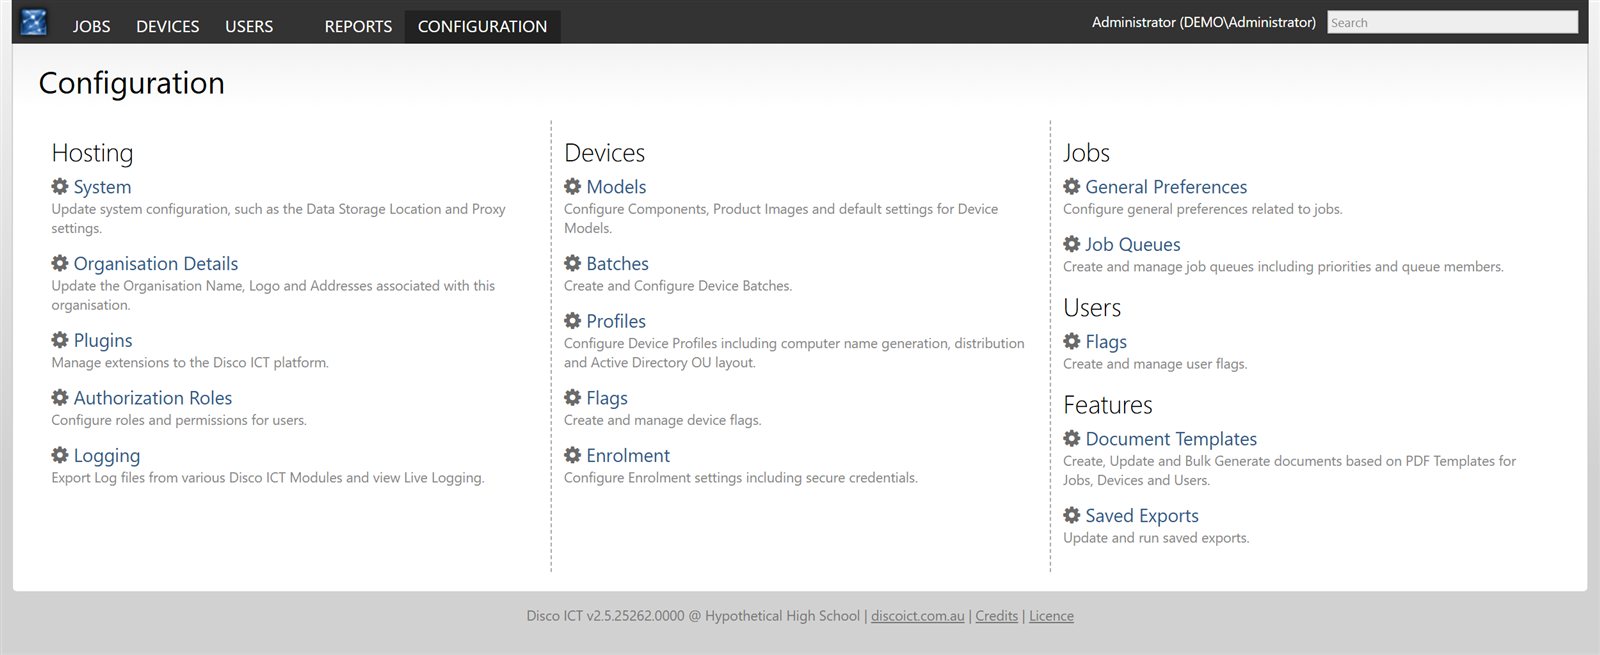
- Hosting: system and organisation settings, plugins, authorization roles and logging.
- Devices: models, batches, profiles, flags and enrolment.
- Jobs: general preferences and job queues.
- Users: user flags.
- Features: document templates and saved exports.
For troubleshooting, open Configuration > Logging to view live events or export logs by date range, event type or module.
Organise your devices
Disco ICT uses three complementary ways to describe devices: a model identifies the hardware, a batch groups a purchase, and a profile groups devices by their use and controls enrolment settings.
Device models
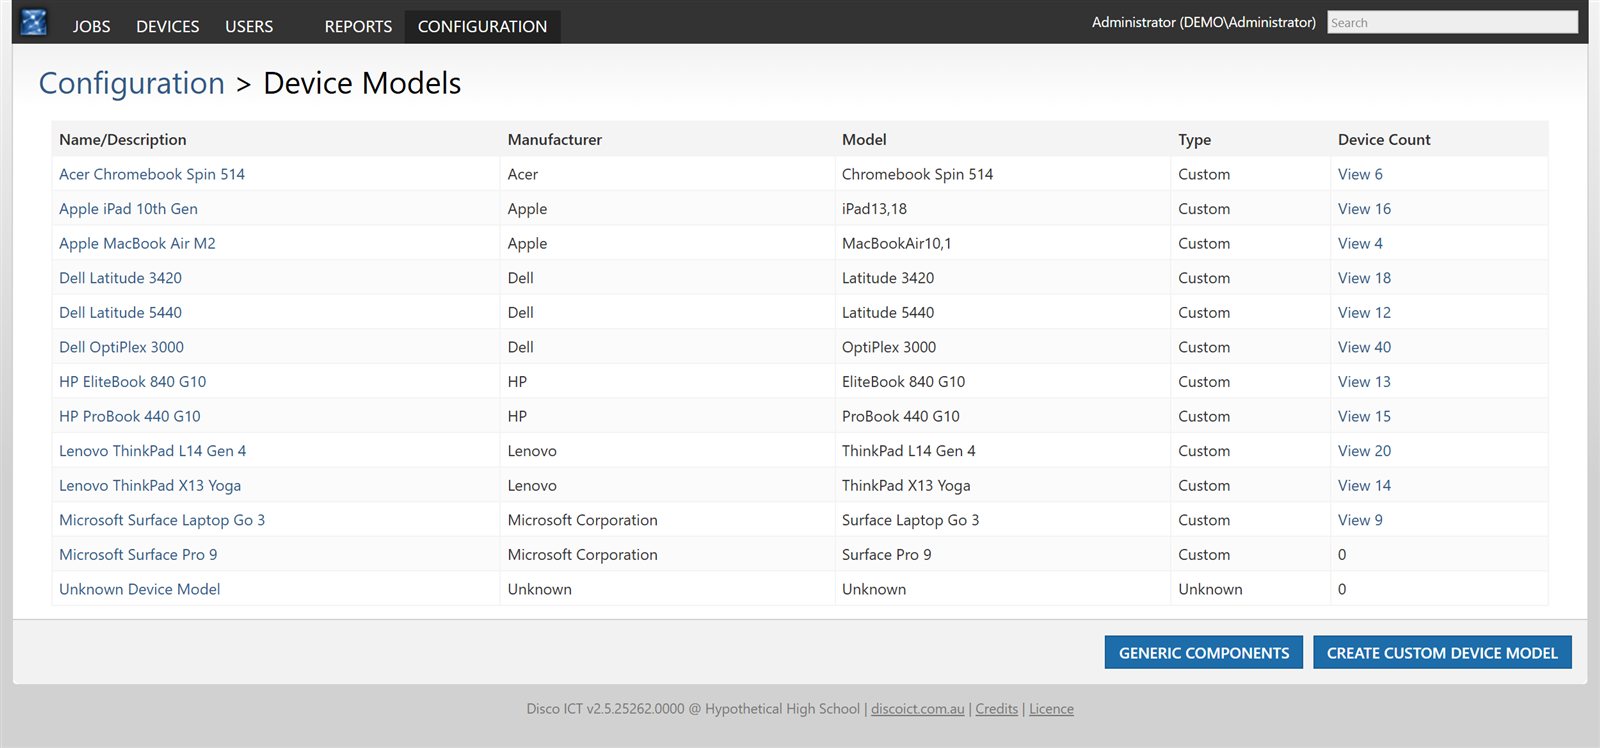
A model describes a make and model of hardware, such as HP ProBook 440 G10. Disco ICT creates a model automatically when it first sees that model enrol. You can also create a custom model.
Open Configuration > Models to see the models and their device counts. To add one yourself, select Create Custom Device Model.
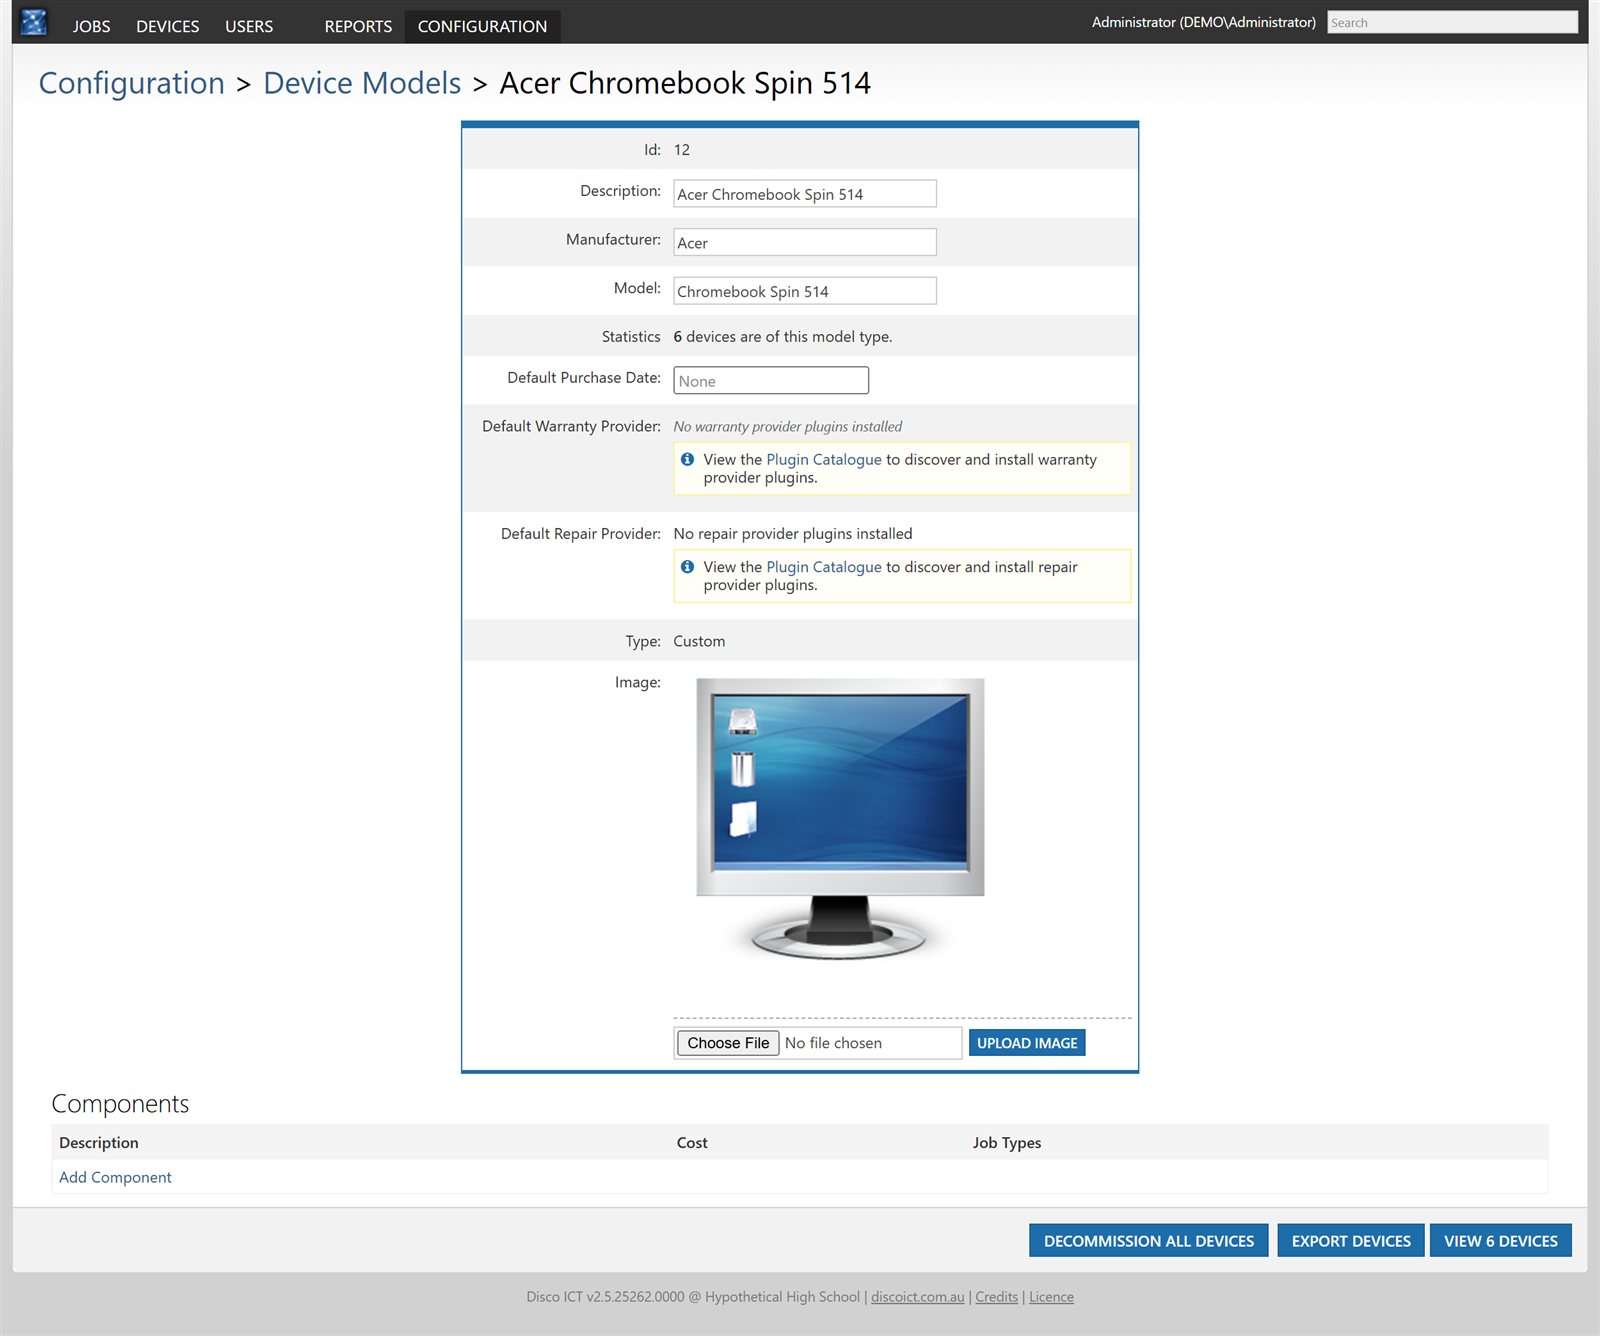
Select a model to edit its description, manufacturer, default purchase date or image. You can also choose default warranty and repair providers when the relevant plugins are installed. Under Components, record parts and their prices for use with jobs that are not covered by warranty.
Device batches
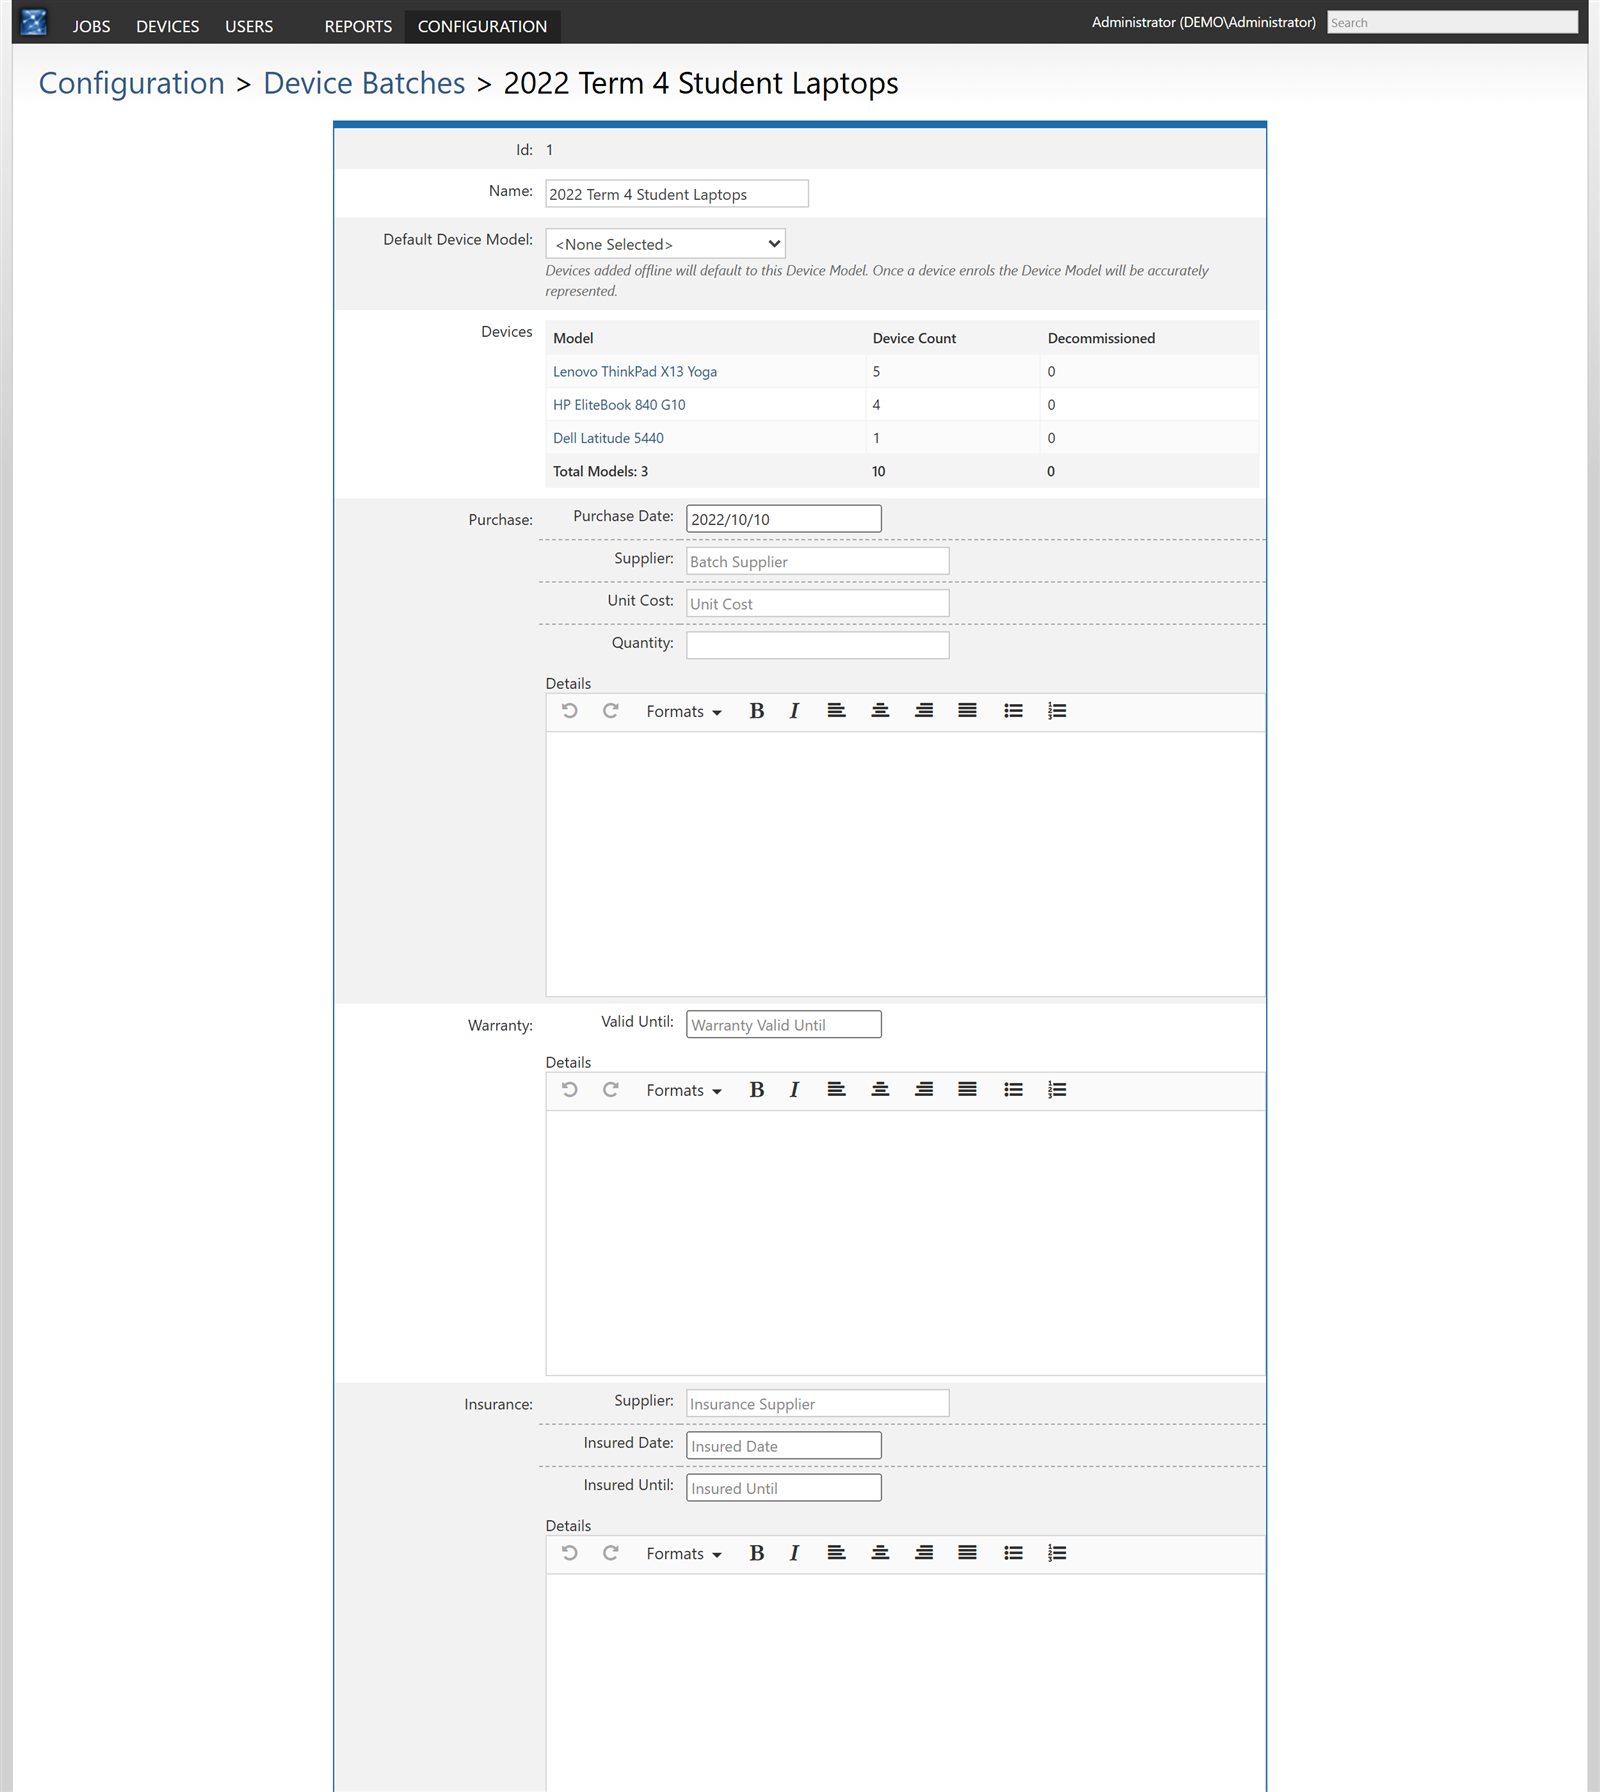
A batch represents a purchase of devices. Record separate purchases as separate batches, even when they contain the same model. A batch can include the purchase date, supplier, unit cost, quantity, warranty and insurance details.
Open Configuration > Batches and select Create Device Batch to add a batch. Select an existing batch to view its devices and record its purchase, warranty and insurance information.
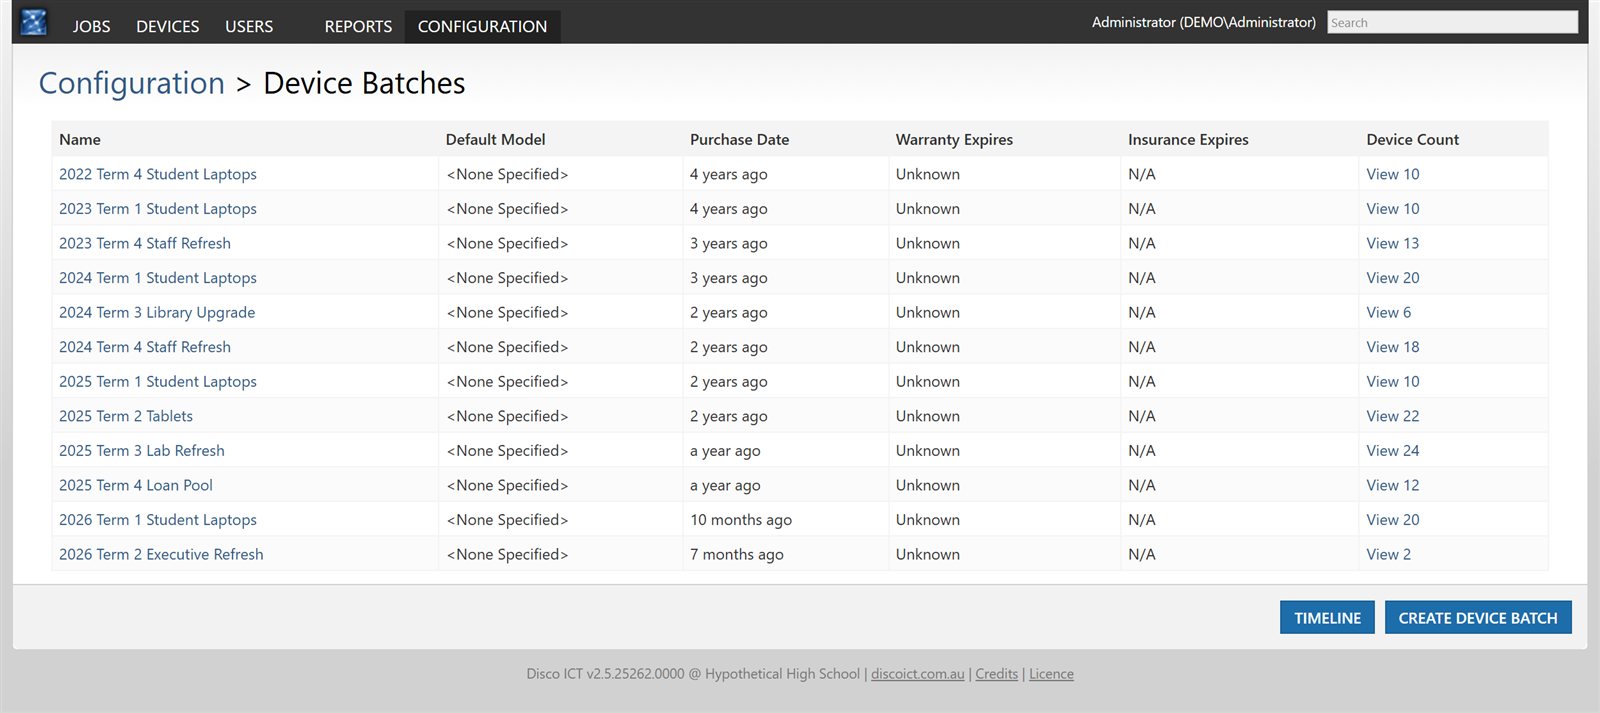
The batch page shows the models and device counts in that batch. The purchase and expiry dates help with warranty and replacement planning; select Timeline on the batch list to see batches over time.
Device profiles
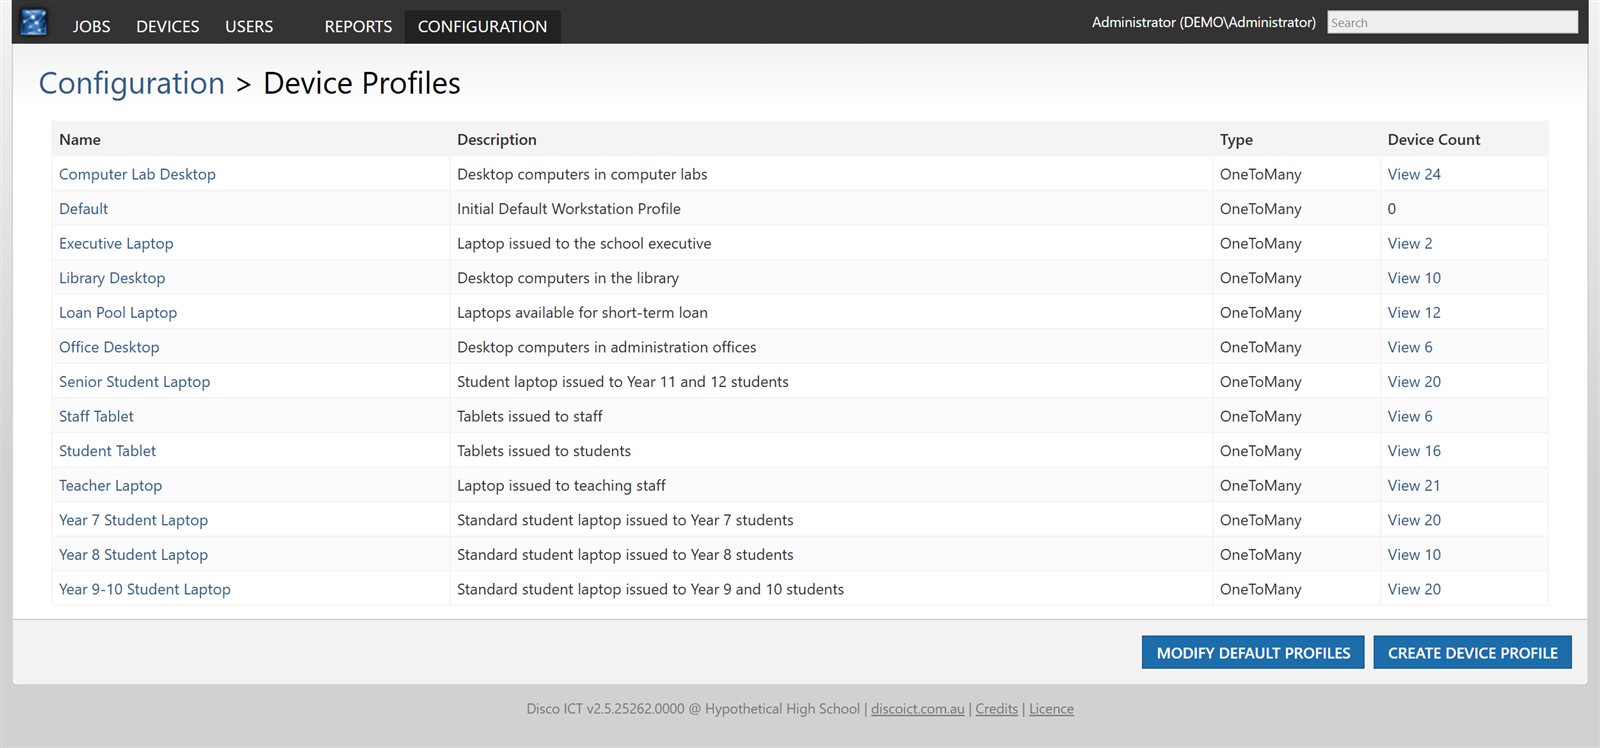
A profile groups devices by how they are used, for example Teacher Laptop or Computer Lab Desktop. It controls settings such as device naming and enrolment. Each device belongs to one profile.
- Open Configuration > Profiles and select Create Device Profile.
- Enter a name, a short name of up to 10 characters, and a description.
- Open the profile to review its settings for your environment.
Important profile settings include:
- Distribution Type: choose One to many for devices that are typically shared, or One to one for devices typically assigned to a user. A one-to-one device’s enrolment is not complete until it is assigned.
- Address: separates jobs in multi-site mode and is suggested as the default address for warranty and repair actions.
- Policies: control Active Directory account provisioning, enrolment of devices from another domain, local administrator access for the assigned user, the user shown at logon, and untrusted enrolment when a Software - Reimage job is open.
- Computer Name Template Expression: controls computer names. The default combines the profile short name, a hyphen and the serial number, such as
Y7-PF13B2023. Select Change to use the expression browser. Computer names change when Active Directory accounts are provisioned; Enforce Naming Convention also applies the convention to devices already joined to the domain. - Organisational Unit: sets where the computer account is created in Active Directory. Enforce Organisational Unit also moves an existing domain-joined device’s account during enrolment.
- Provision Certificates: allocates certificates when certificate provider plugins are installed.
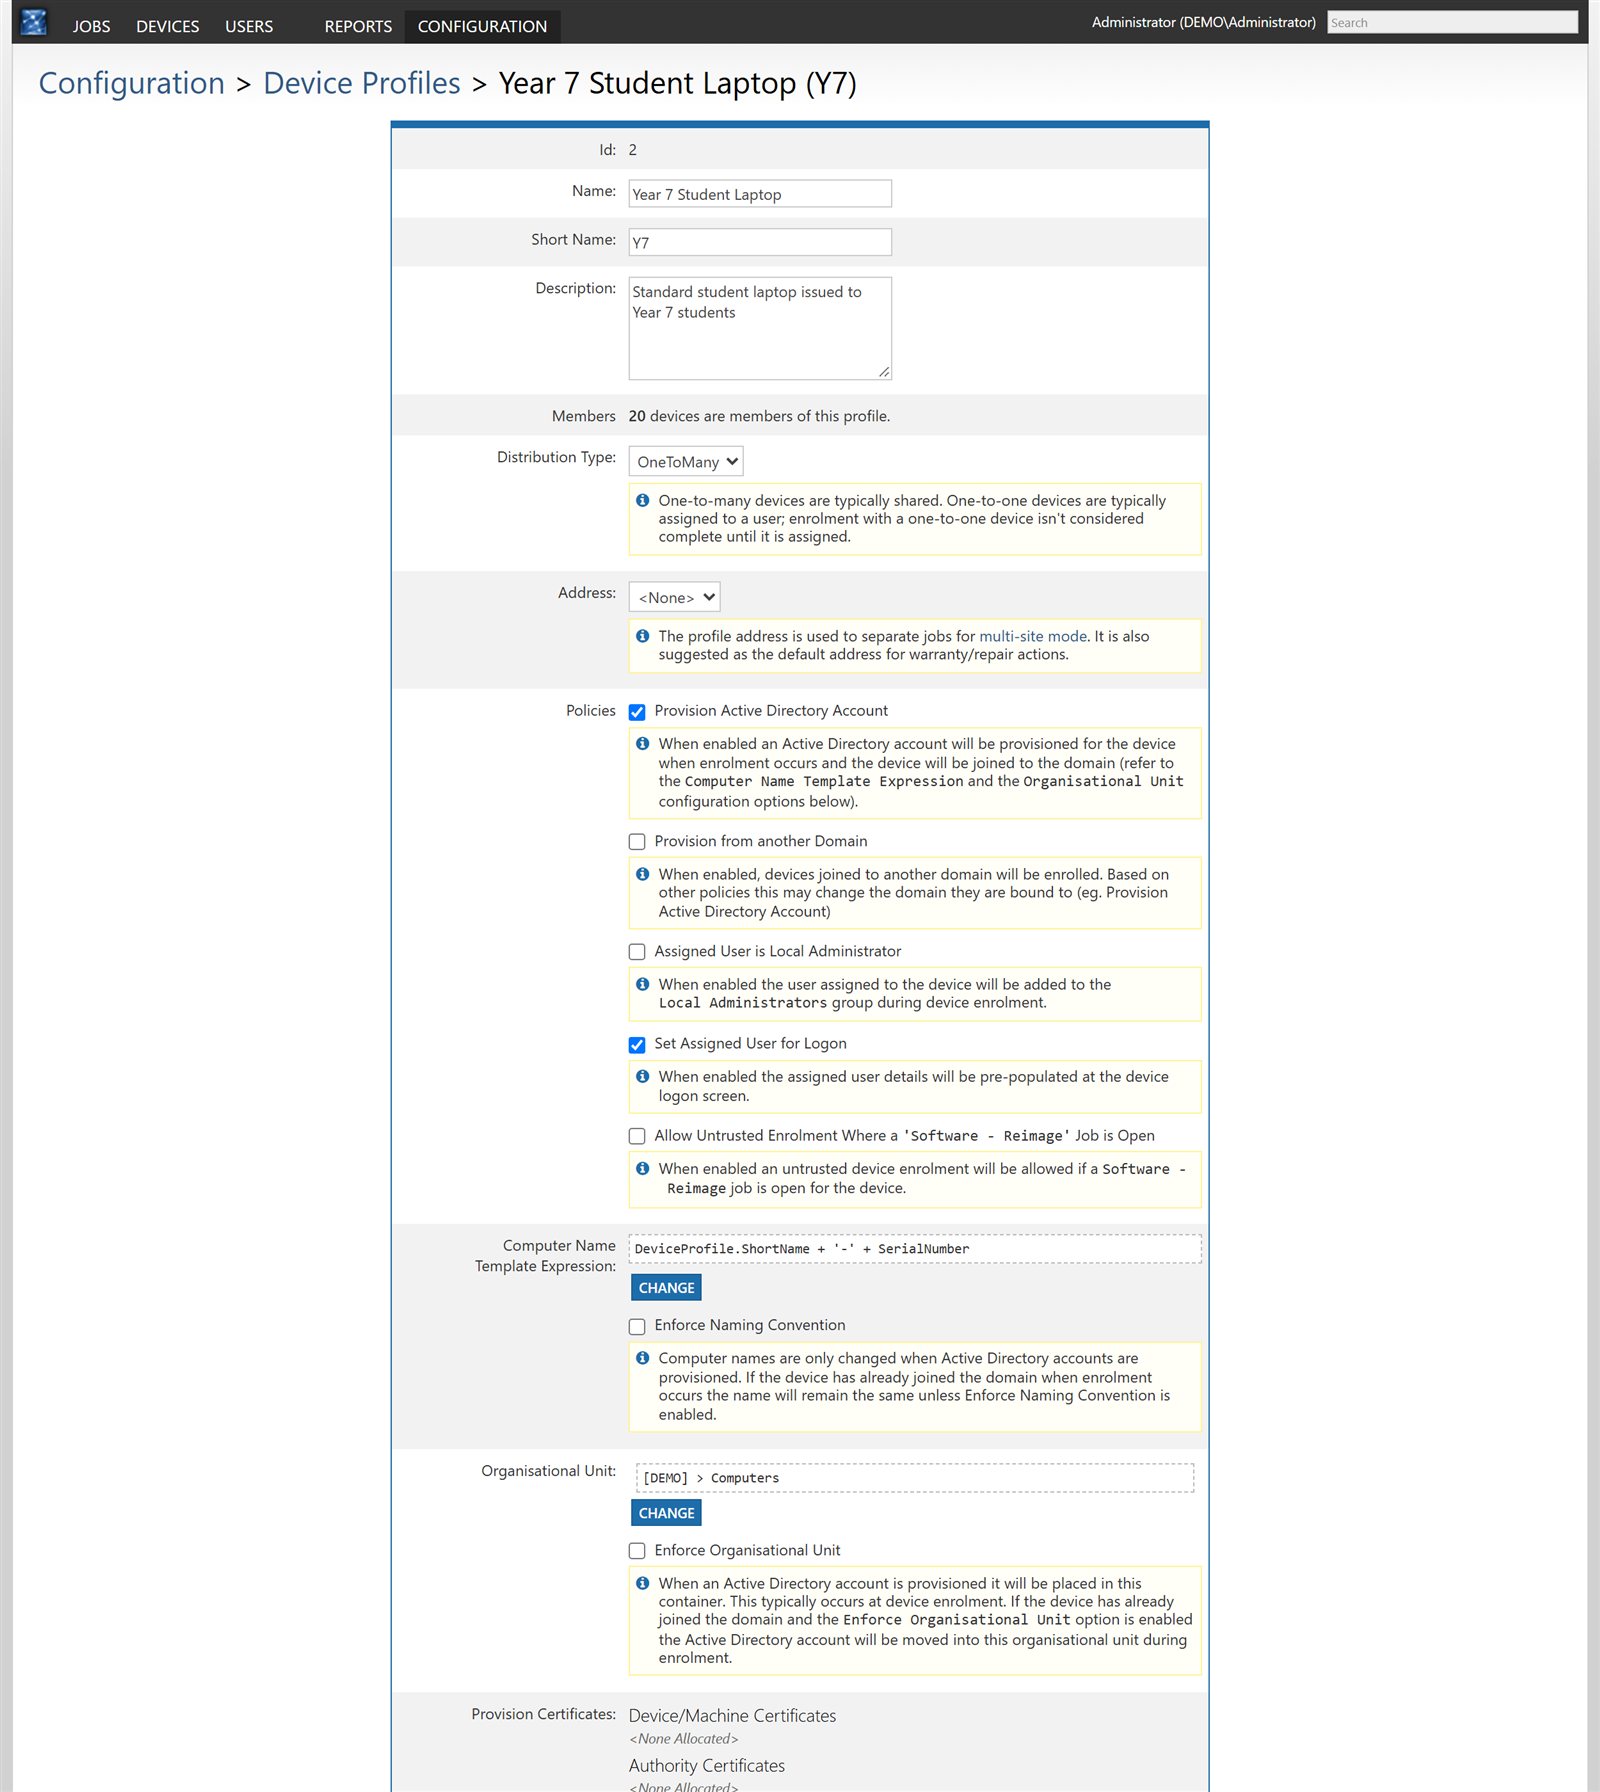
The screenshot is an example of the available settings, not a recommended configuration for every profile.
Enrol devices
Enrolment introduces a device to Disco ICT. Open Configuration > Enrolment to download the Windows client bootstrapper, configure Apple Mac enrolment and view live enrolment events.
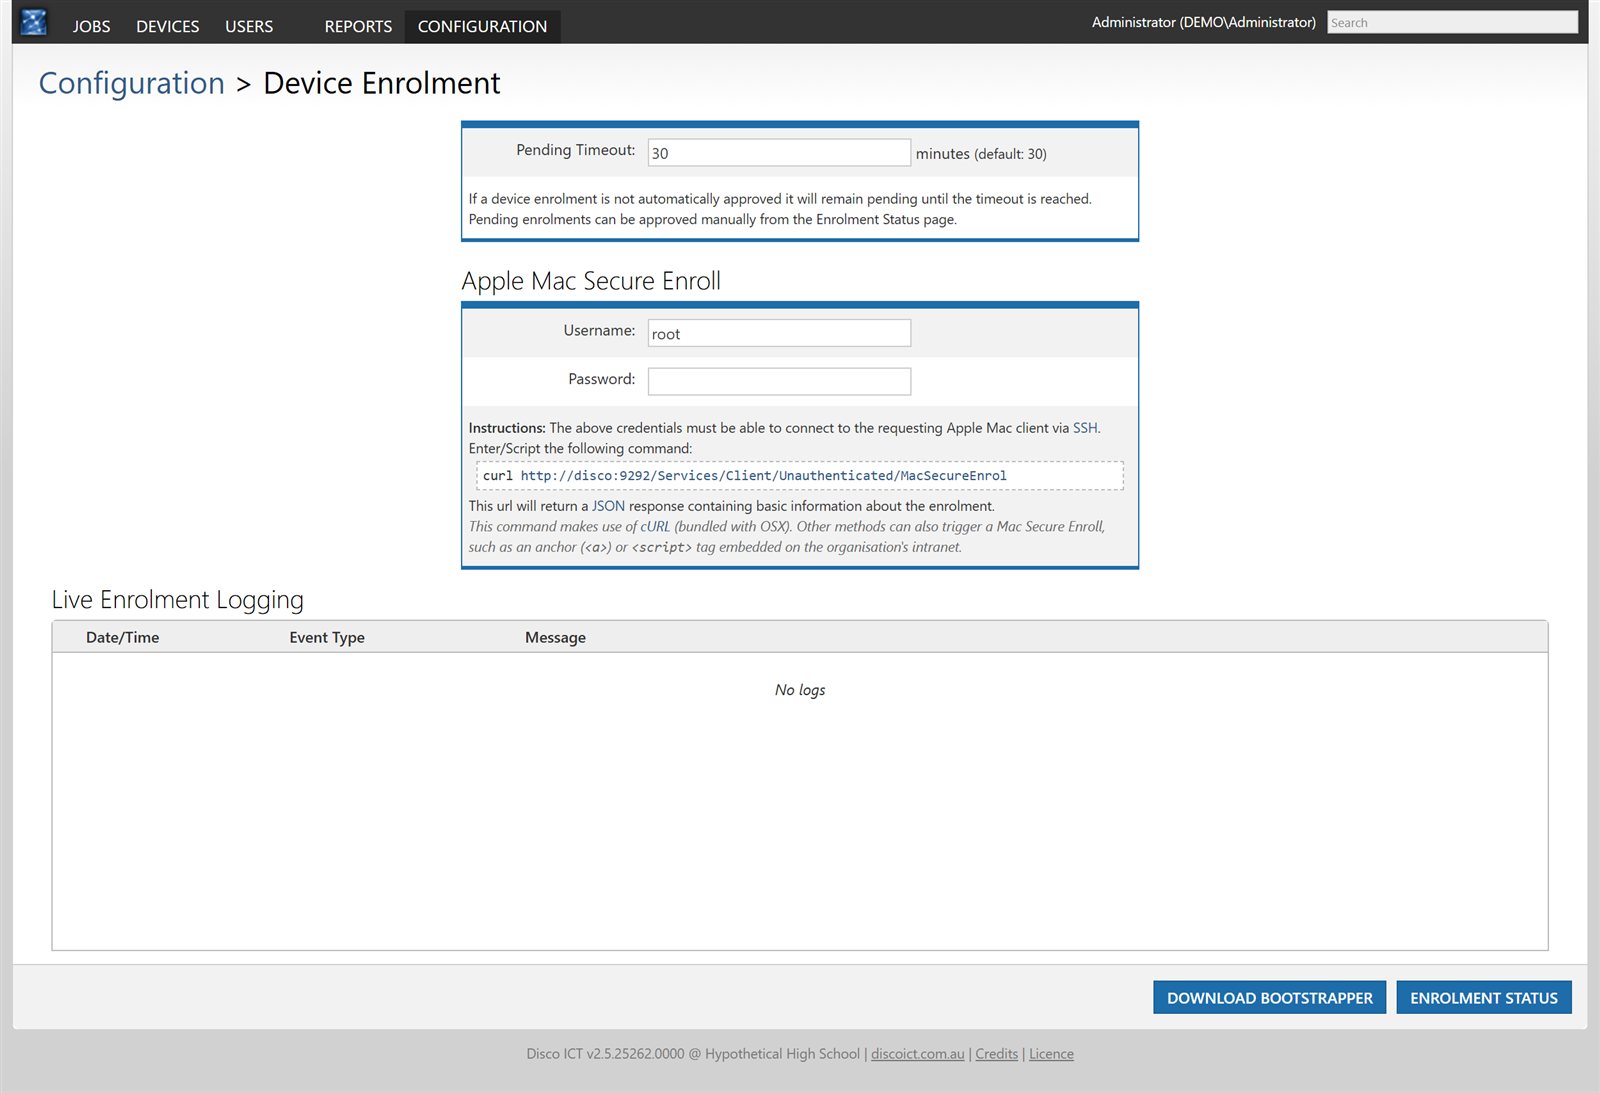
For a Windows device, select Download Bootstrapper and run the client bootstrapper on the device. For an Apple Mac, enter credentials that can connect to the Mac over SSH, then run the curl command shown on the page from the Mac.
Select Enrolment Status to check the day’s sessions and investigate failures. If an enrolment is not automatically approved, it remains pending until the configured Pending Timeout; you can approve it manually from the status page.
Find and import devices
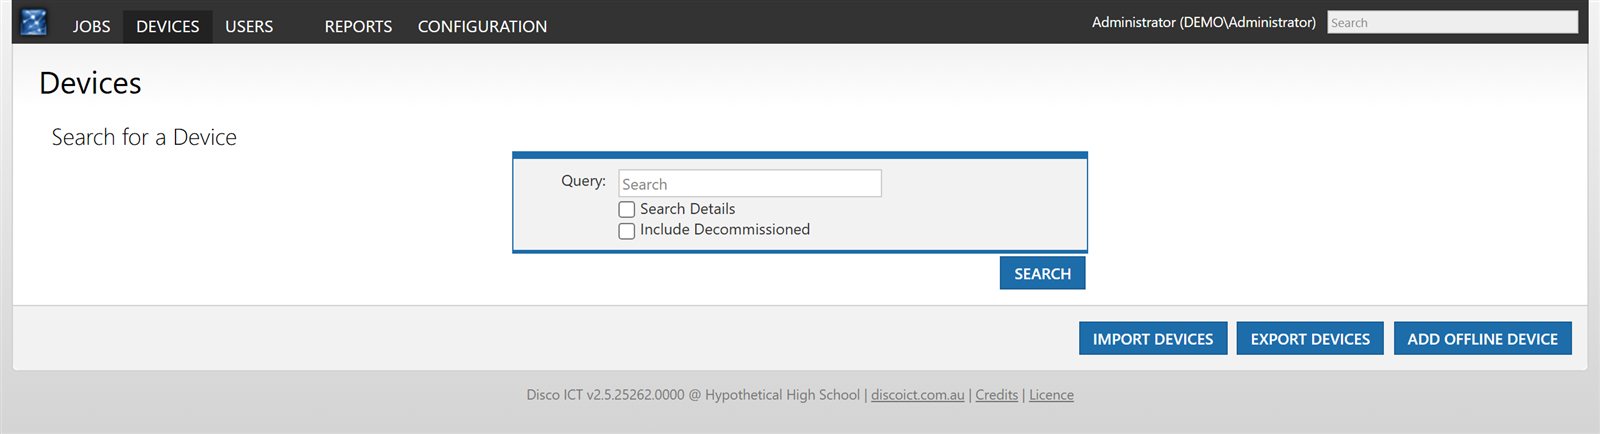
Open Devices and search by serial number, asset number, computer name, assigned user or other details. The page also offers Import Devices, Export Devices and Add Offline Device.
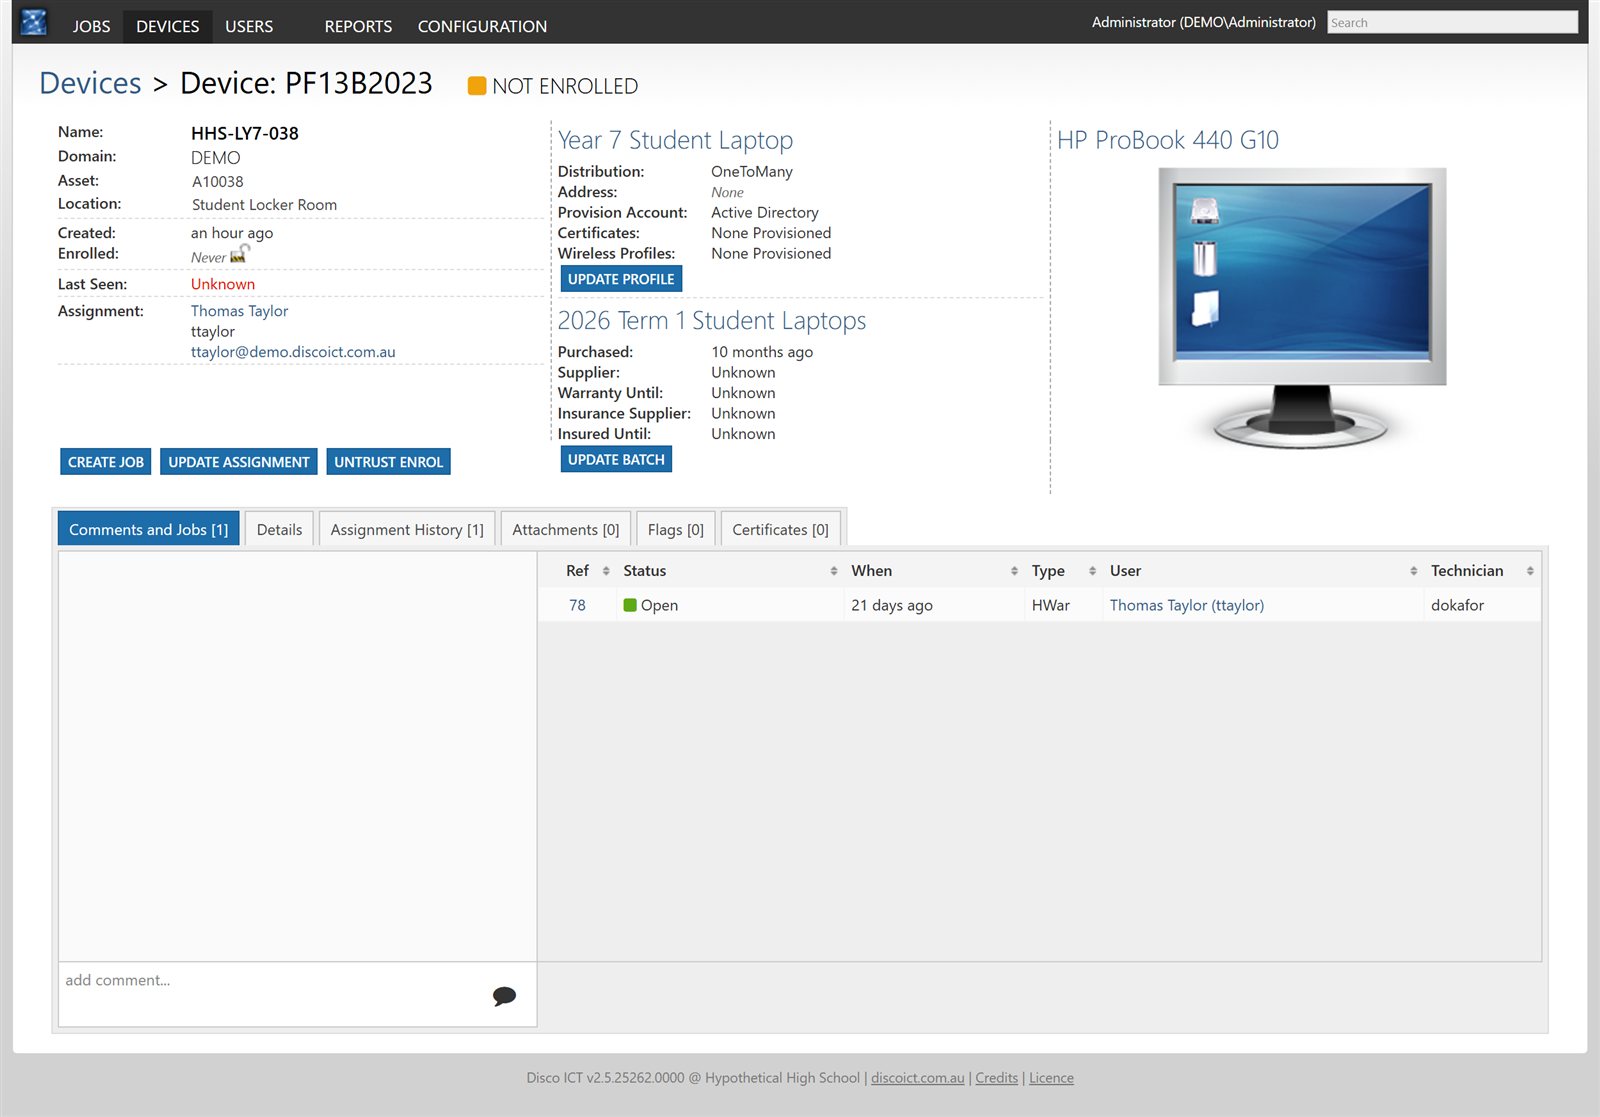
Select a device to see its enrolment status, last seen time, assigned user, model, profile and batch. Its tabs provide comments and jobs, assignment history, attachments, flags and certificates. A device that has not enrolled shows Not Enrolled.
Import a device list
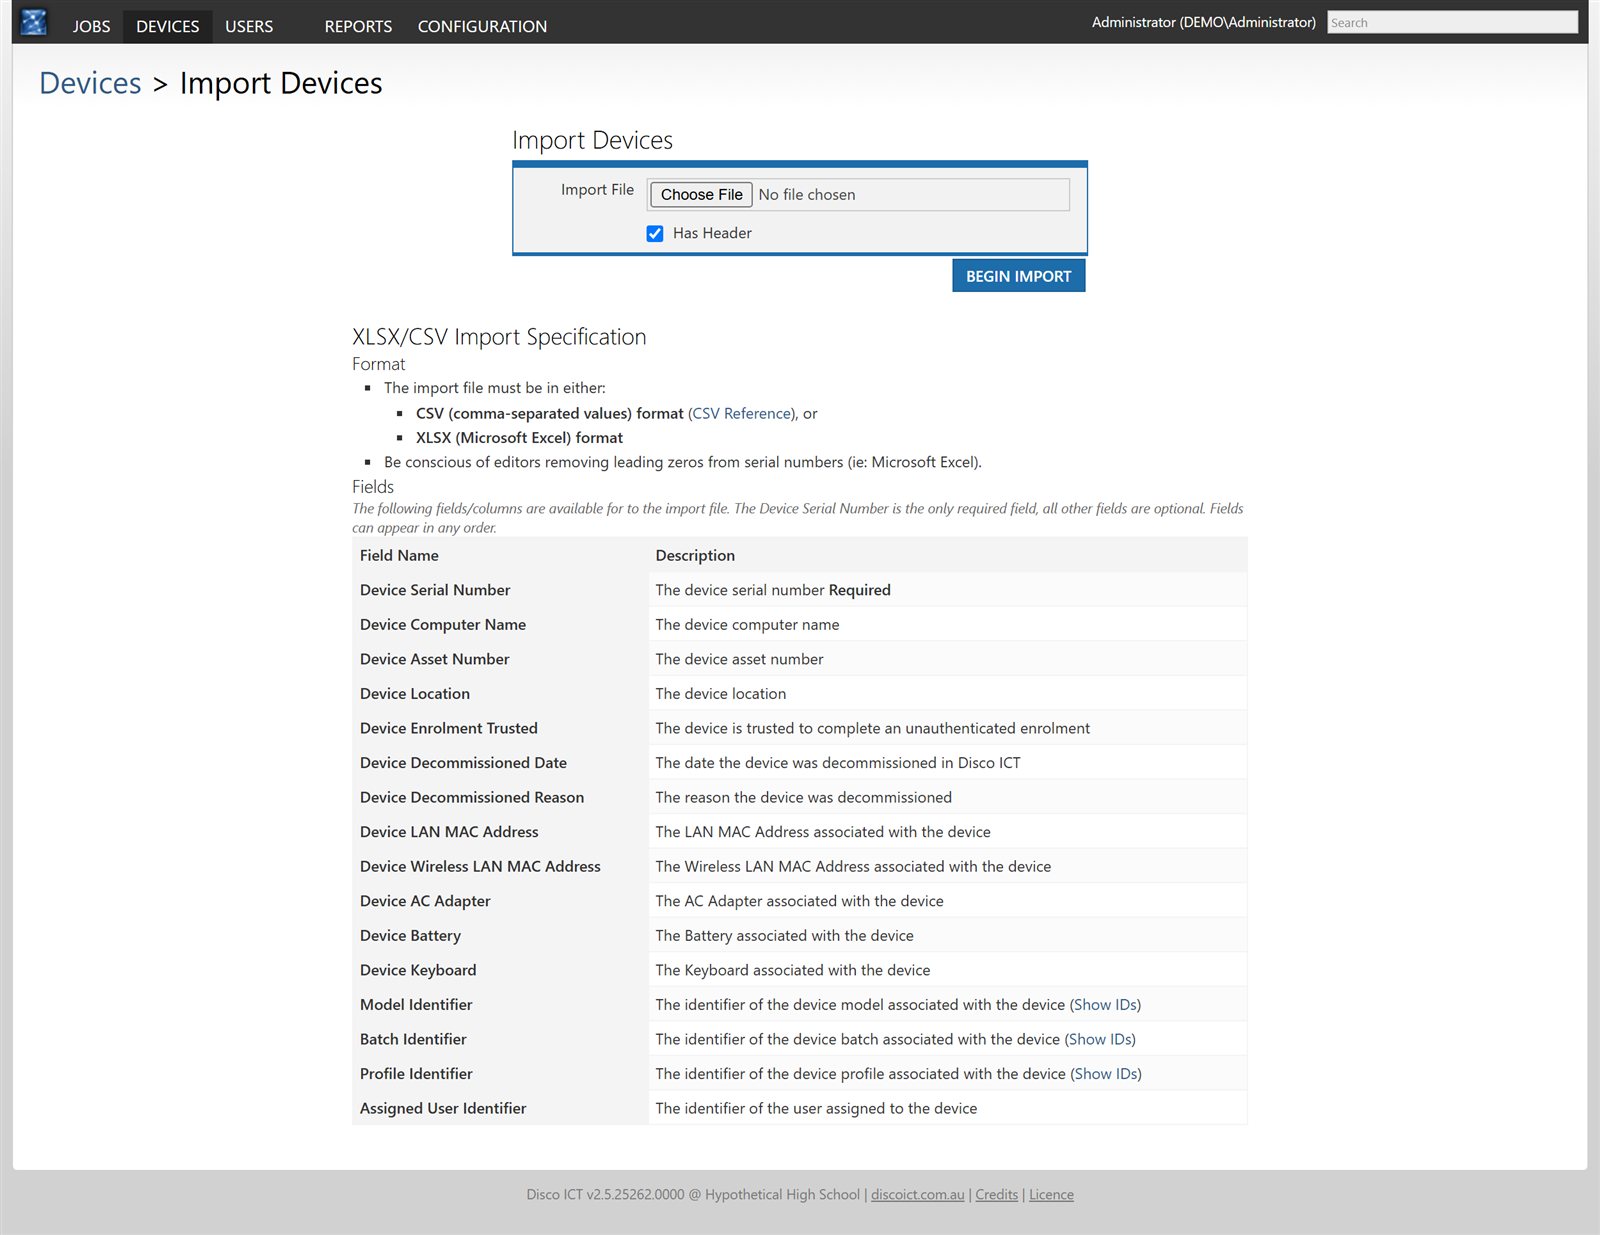
To add devices in bulk, select Devices > Import Devices:
- Prepare a CSV or XLSX file. The serial number is the only required field. Optional fields include the computer name, asset number, location, MAC addresses and identifiers for the model, batch, profile and assigned user.
- Check that spreadsheet software has not removed leading zeros from serial numbers.
- Select the file, set Has Header to match your file and select Begin Import.
The import page lists the supported fields and provides links to the model, batch and profile identifiers.
Find users and manage flags
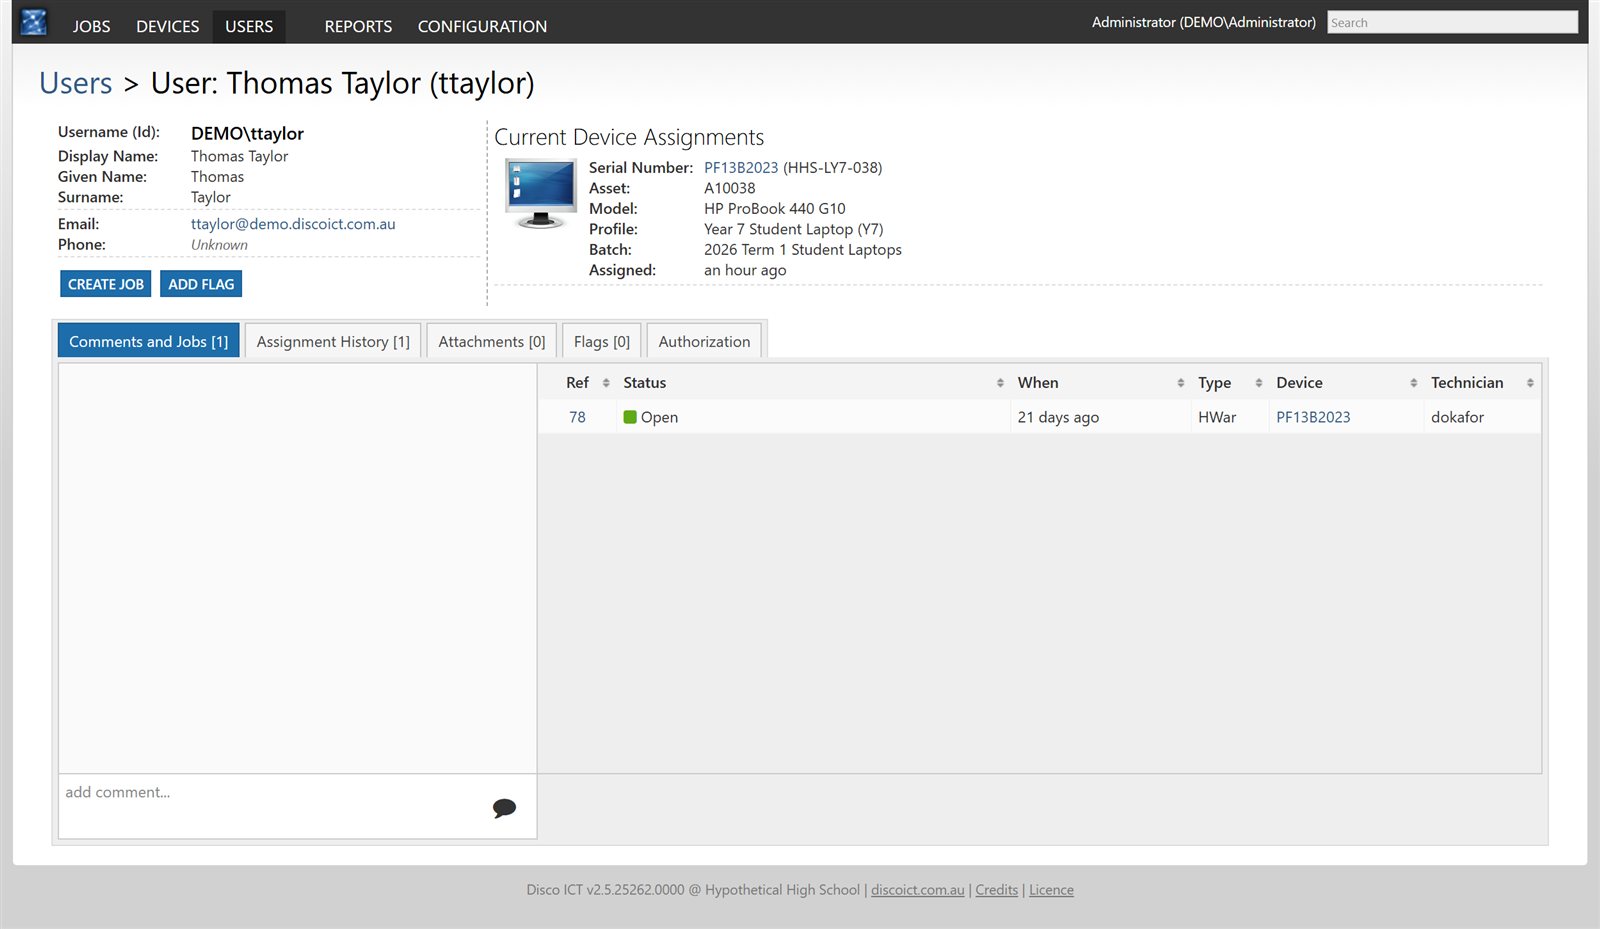
Users in Active Directory appear in Disco ICT automatically; there is no separate user import. Open Users and search for a user to view their details, assigned devices, jobs, assignment history, attachments and flags. From the user’s record, you can also create a job or add a flag.
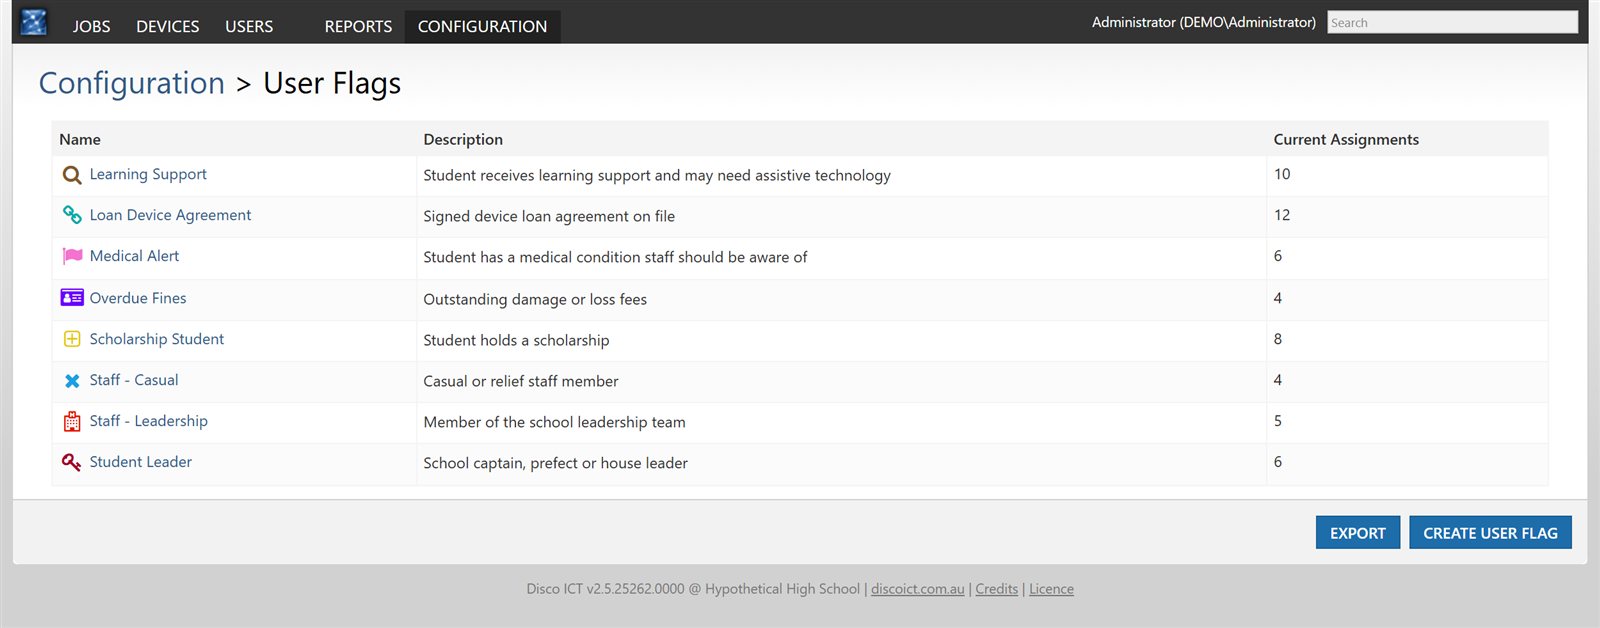
User flags identify users who need particular handling, for example Loan Device Agreement or Staff - Leadership. Open Configuration > Flags under Users to manage flags. The list shows each flag’s description and current assignment count; flags appear on the user’s record.
Create and manage jobs
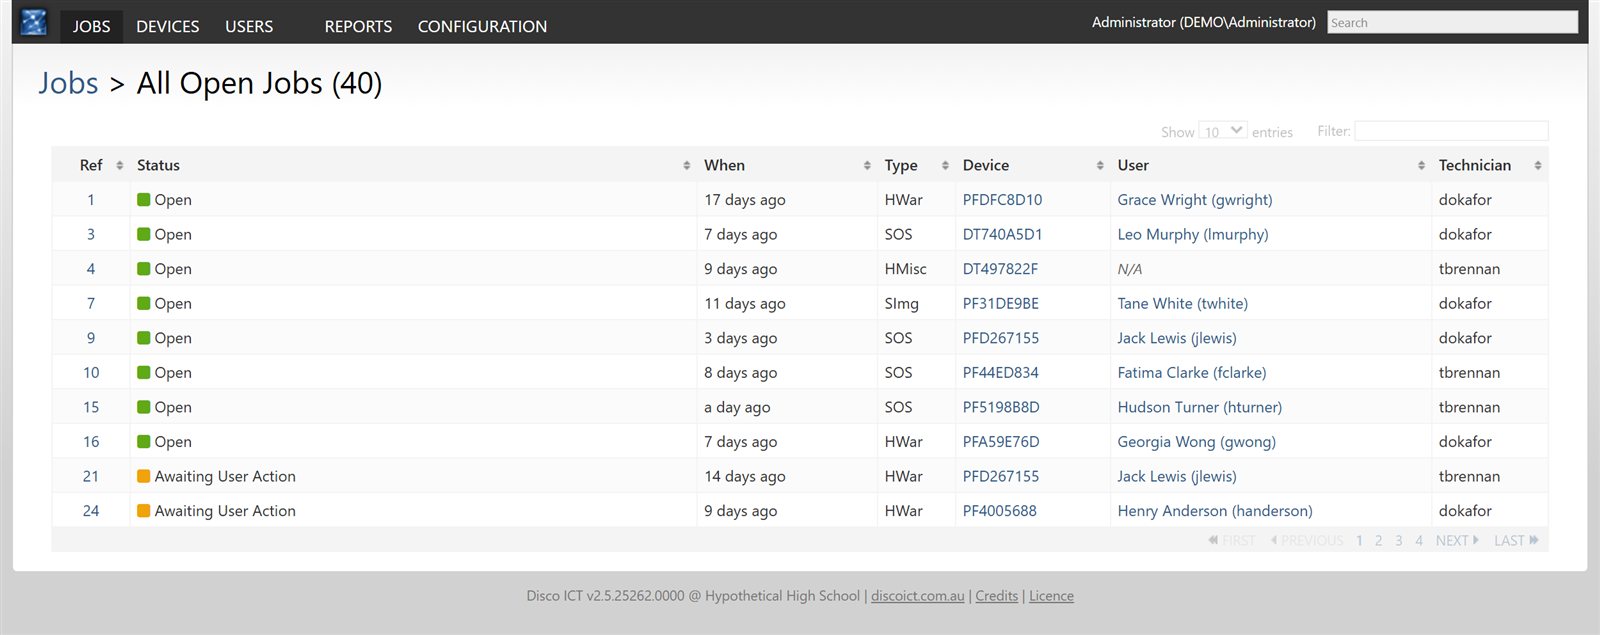
Use Jobs to find and manage technician work. The jobs home page provides search, a chart of jobs opened and closed each day, and jobs assigned to you. Other lists group work by status, including open jobs, jobs awaiting action and devices ready for return. You can sort and filter these lists.
To create a job:
- Find and open the relevant device or user.
- Select Create Job, choose a job type and describe the problem.
- Select Create to open the job.
The job record shows its type and subtypes, associated device and user, and comments and attachments. Use the controls beside the comment box to add attachments or photos. Comments are for technicians and are not shown to the user.
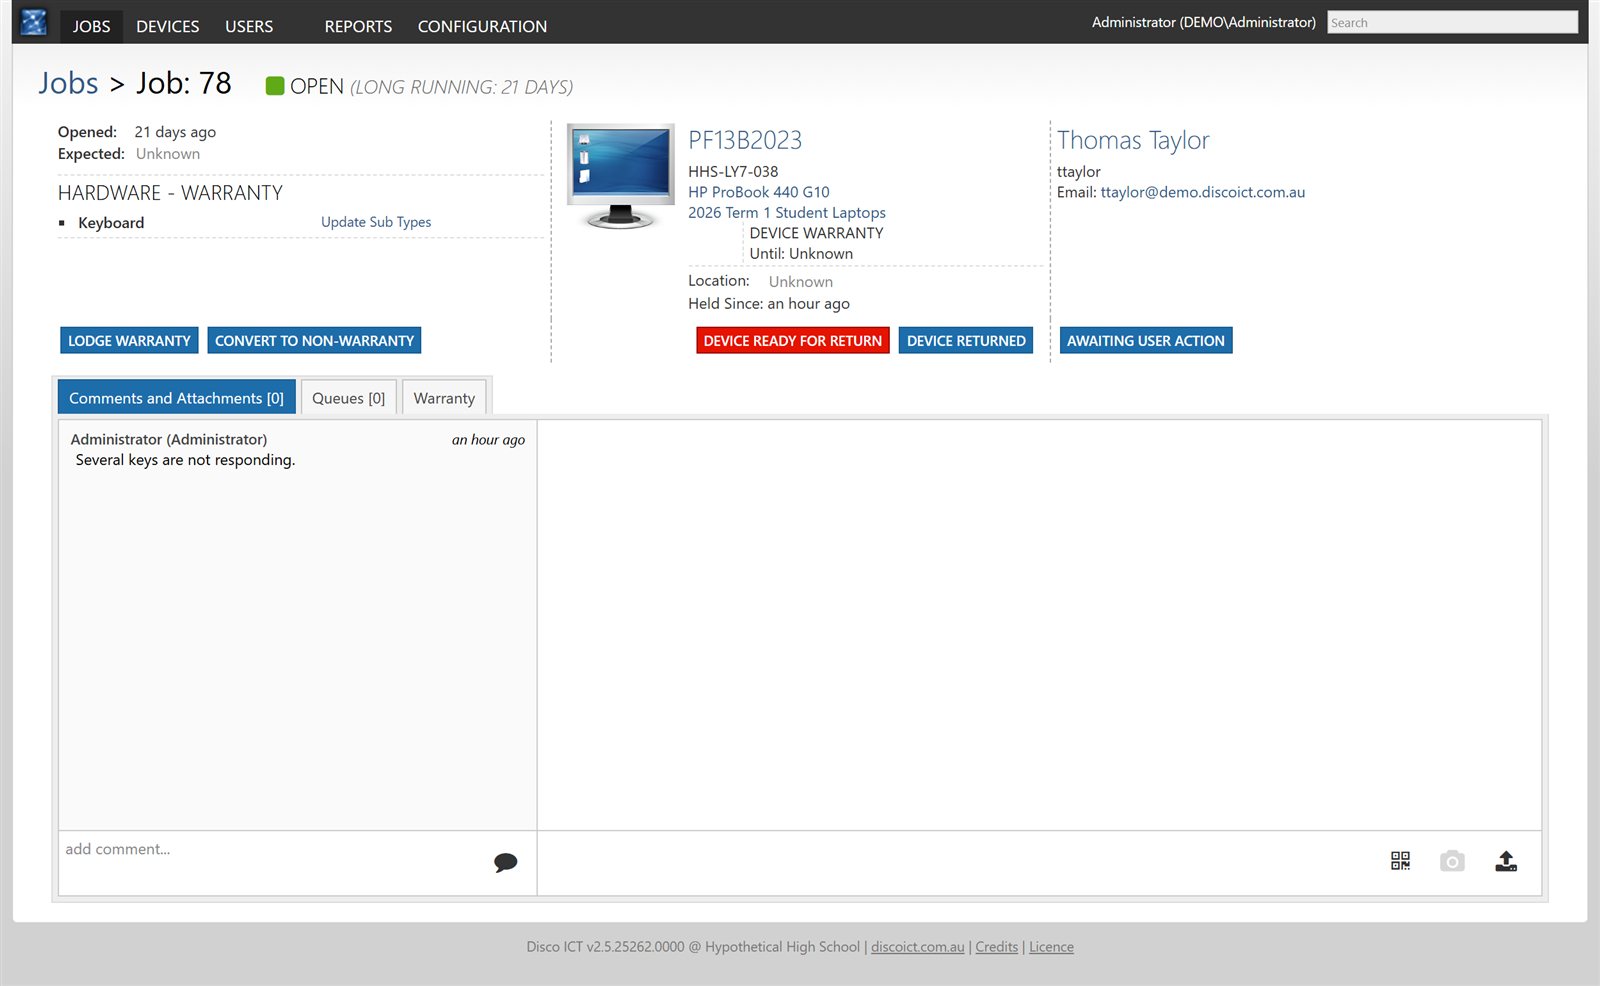
Depending on the job, you can lodge a warranty claim, convert it to non-warranty, mark the device ready for return, record its return, mark the job as awaiting user action or close it. Under Configuration, use Job Queues to route work to groups of technicians with priorities, and General Preferences to configure job behaviour.
Use public reports
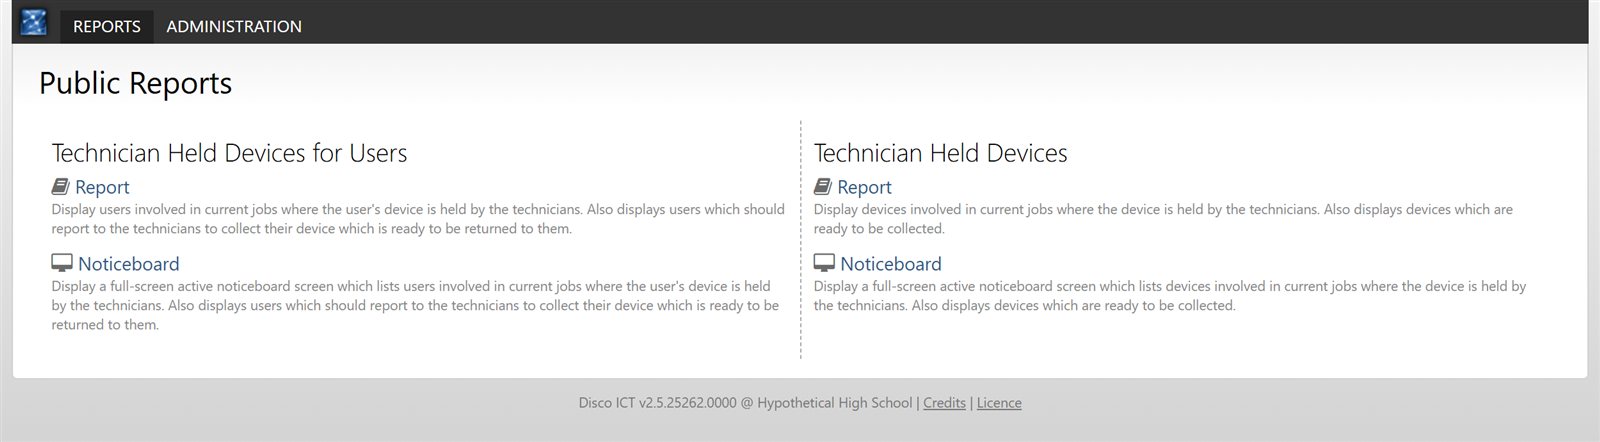
The Reports menu includes public reports that do not require a logon. A Noticeboard can be displayed on a screen or linked from an intranet so users can see whether devices are held by technicians or ready for collection.
Use the Report Link Builder in Job Preferences to create a filtered report.
Explore document templates and plugins
Disco ICT can generate documents for devices, jobs and users from PDF templates. It can also use a QR code to attach scanned documents to the appropriate record. See Getting Started with Document Templates.
Plugins add capabilities such as warranty or certificate providers. Manage them under Configuration > Plugins; a new installation has no plugins installed.