Jobs - Hardware - Non-Warranty
This page contains screenshots from Disco ICT v1 and will be updated shortly.
Non-Warranty jobs include situations which require costing or payments. Insurance Claims are also covered by this job type.
| 1: | 
Locate either the Device or Device's Assigned User. Both the device and it's currently assigned user are attached to the Job. |
| 2: | 
Click Create Job. |
| 3: | 
Select the Job Type: Select the Job Sub-Types. Multiple Job Sub-Types can be selected if required. |
| 4: |
Fill out additional job settings in accordance with your organisations procedures:
|
| 5: | 
Add Job Attachments. Attachments can be uploaded from files or captured with an attached High Definition Webcam. |
| 6: | 
Generate Documents Documents can be generated from any Disco PDF Template which can be easily made by any Disco user. Disco PDF Templates are similar to a Microsoft Word Mail Merge, but with the power of Microsoft Excel formulas (optional).
 |
| 7: | 
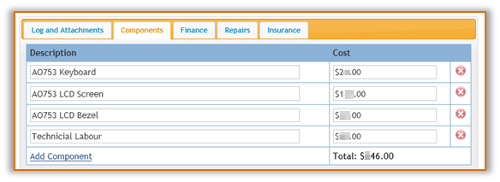
Validate and Update Job Components Job Components are automatically added based on the Device Model and Job Sub-Types. These components can be used in the generation of documents, such as the Repair Quote shown here.  |
| 8: | 
Finance Records These details are used to keep track of payment requirements and statuses. |
| 9: | 
Insurance Claim Common insurance claim information can be added here, and then used for Document Generation. Insurance Claim PDF forms can be added into Disco and completed automatically. |
| 10: | 
Log Repairs Organise repairs for the device and enter details into the job. Job Attachments can be used to store quotes. |
| 11: | 
After the repairs are completed, mark the Repair Complete. The repair technician may be given access to perform this task and review or add job comments or attachments. |
| 12: |
Complete any other tasks required (such as reimaging, etc) |
| 13: |
Mark the device as Ready for Return. When the user collects the device the job can be closed. |

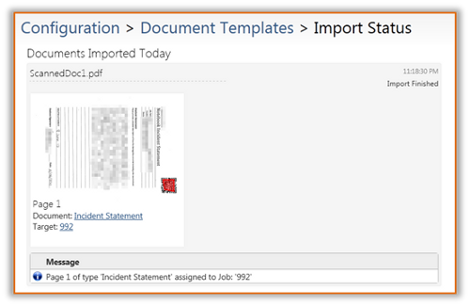
 Generated
Documents can optionally include a unique QR Code. This allows
any scanned-in document to be recognised automatically by Disco and
added as an attachment to the appropriate job. This process can be
easily done in batches or one at a time directly from a
photocopier.